Trimming a whole packer brisket can seem intimidating the first time you do it. You're staring at a big cut of beef, sharp knife in hand and asking, "What stays and what goes?" Take off too little and you're left with thick deposits of hard fat that won't render. Take off too much and you can expose the meat and leave it unprotected during a long cook.
The good news is that trimming a brisket doesn't have to be complicated. With an understanding of the different muscles and types of fat, trimming a brisket becomes much easier. The goal is to remove the parts that aren't going to help you, leave the fat that will, and create a relatively uniform brisket that will cook as evenly as possible.
I've trimmed and smoked a lot of briskets over the years, and my approach is fairly simple. In the steps ahead, we will walk through a simple, repeatable trimming process - from identifying the hard fat and loose edges to shaping the point and flat to ensure even cooking.
Jump to:
- What You'll Need to Trim a Brisket
- Know the Parts of a Brisket Before You Start Trimming
- Step 1: Trim the Edges of the Brisket
- Step 2: Remove Thin Pieces That Will Dry Out
- Step 3: Clean Up the Meat Side
- Step 4: Remove the Hard Fat
- Step 5: Trim the Fat Cap to About ⅜ to ½ Inch
- Step 6: Shape the Brisket
- Step 7: Mark the Direction of the Grain
- Step 8: Clean Up the Fat Seam Between the Point and Flat
- What Should a Properly Trimmed Brisket Look Like?
- Common Brisket Trimming Mistakes
- Frequently Asked Questions About Trimming a Brisket
- Final Thoughts
What You'll Need to Trim a Brisket
A sharp knife and a large cutting board are essential. You need enough room to turn a whole packer brisket around as you work, so use the largest cutting board you have. I prefer plastic because it's easy to clean and sanitize after working with raw beef.
Trimming a brisket involves making relatively shallow, controlled cuts. I prefer to use a scimitar, basically a large knife with a curved blade. It works especially well for removing large chunks of fat and shaping the brisket. Make sure that the knife is sharp. A sharp blade will glide through the fat, give you a cleaner cut, and help avoid removing more meat than necessary.
Most importantly, keep the brisket cold until you're ready to trim it. I take mine directly out of the refrigerator and start working. Cold fat is firmer and much easier to cut cleanly than warm, soft fat.
Know the Parts of a Brisket Before You Start Trimming
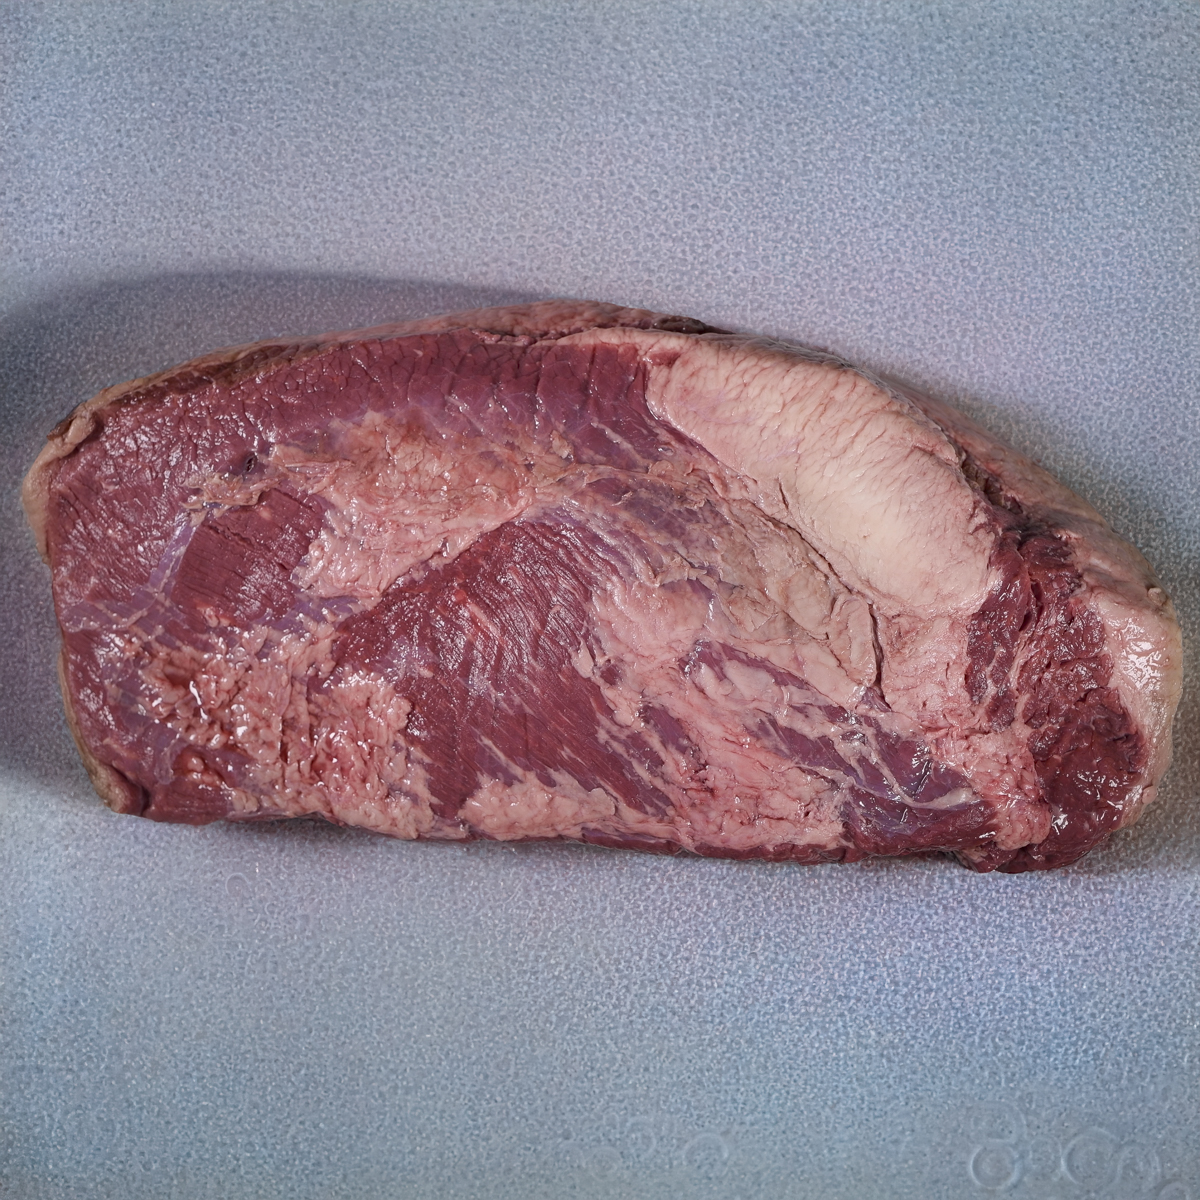
A whole packer brisket consists of two overlapping muscles: the flat and the point. The flat is the long, relatively uniform muscle prized for lean, even slices. The point sits partially on top of the flat and is thicker, with more marbling than the leaner flat.
Before you make a cut, spend a minute looking at the brisket. Identify the meat side and fat side, locate the flat and point, and look for areas that are unusually thin or unusually thick. That will give you a much better idea of what needs to be done.
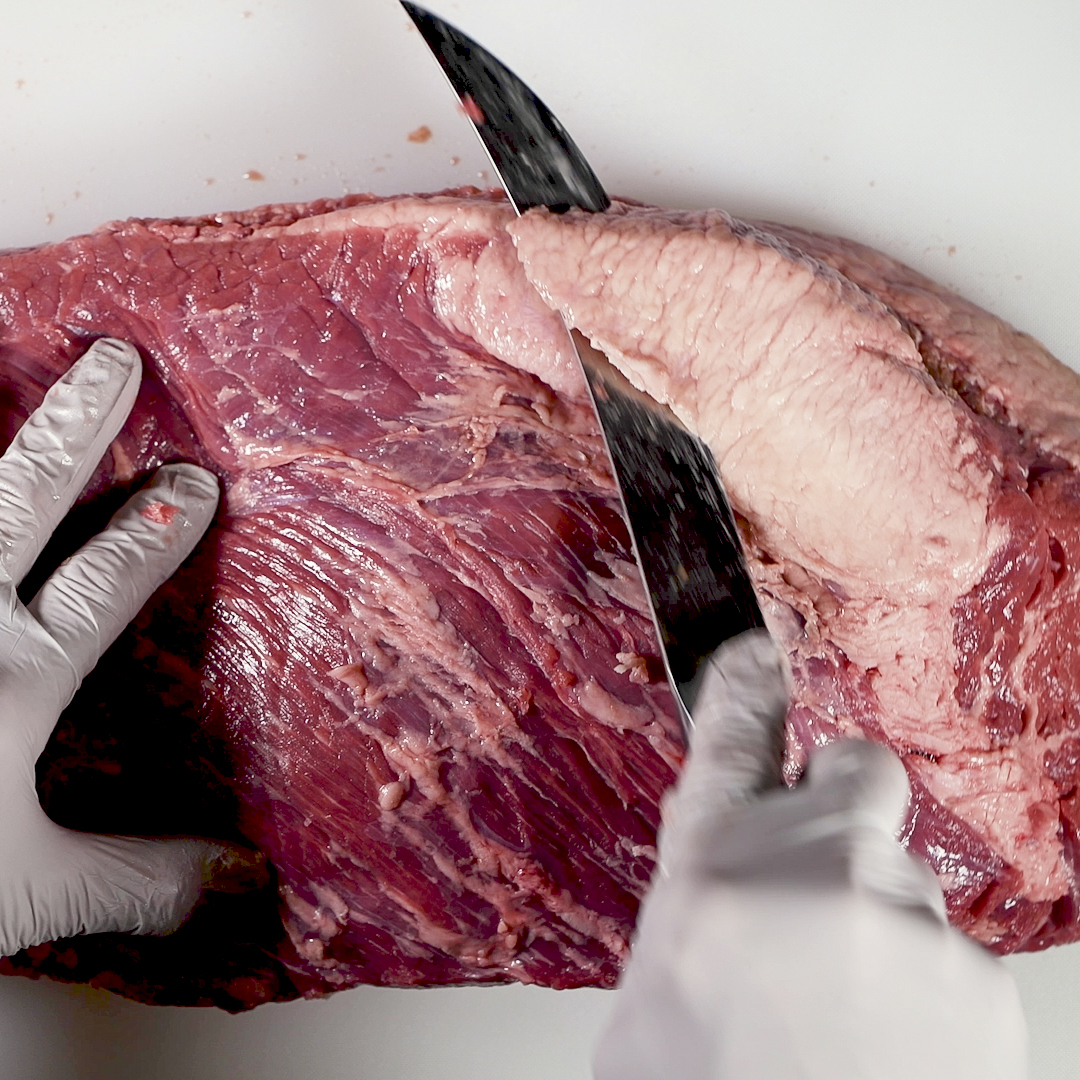
Between the point and the flat is a substantial seam of fat. You will want to trim some of that fat, but I don't completely separate the point from the flat. Cut along the visible line of fat, slice down into the thick pocket of hard fat and pull it out while leaving the muscles attached. You want the brisket to remain intact while it cooks.
Another important feature is the fat cap, the layer of fat covering one side of the brisket. You want to reduce the thickness of that fat considerably, but not remove it.
Step 1: Trim the Edges of the Brisket
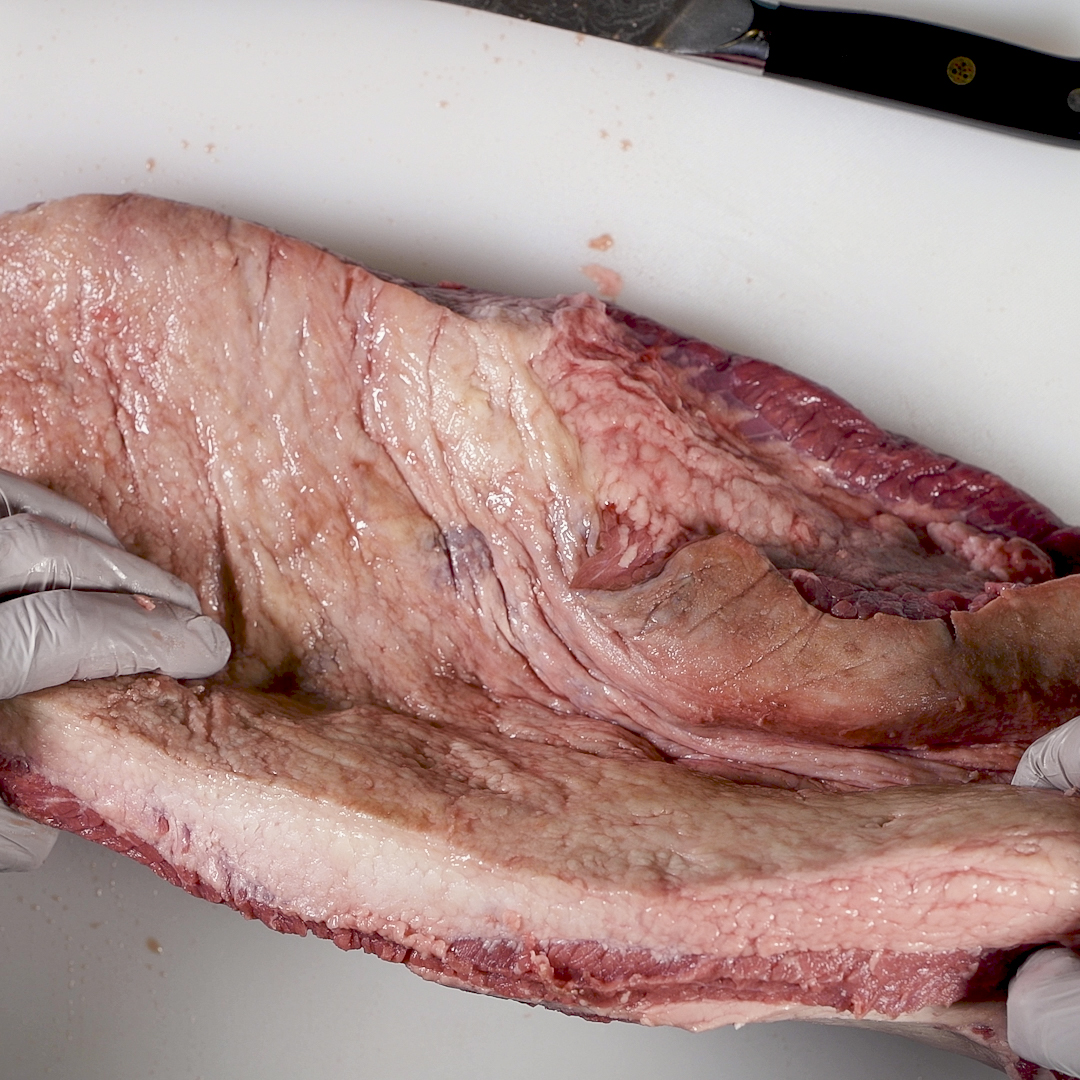
Start by trimming approximately ⅛ to ¼ inch from the leading edge of the brisket. There are two reasons for doing this. First, you want a clean edge and to remove any meat that may have oxidized or become ragged during processing. More importantly, that fresh cross-section allows you to see exactly how thick the fat cap is.
That's useful information once you start trimming the fat side. Fat isn't distributed evenly across a brisket. One area may already have very little fat while another has far more. Seeing the layers from the edge helps you determine how aggressively to trim.
Do the same thing anywhere else along the perimeter of the brisket that needs to be squared up, while being careful not to cut into good meat.
Step 2: Remove Thin Pieces That Will Dry Out
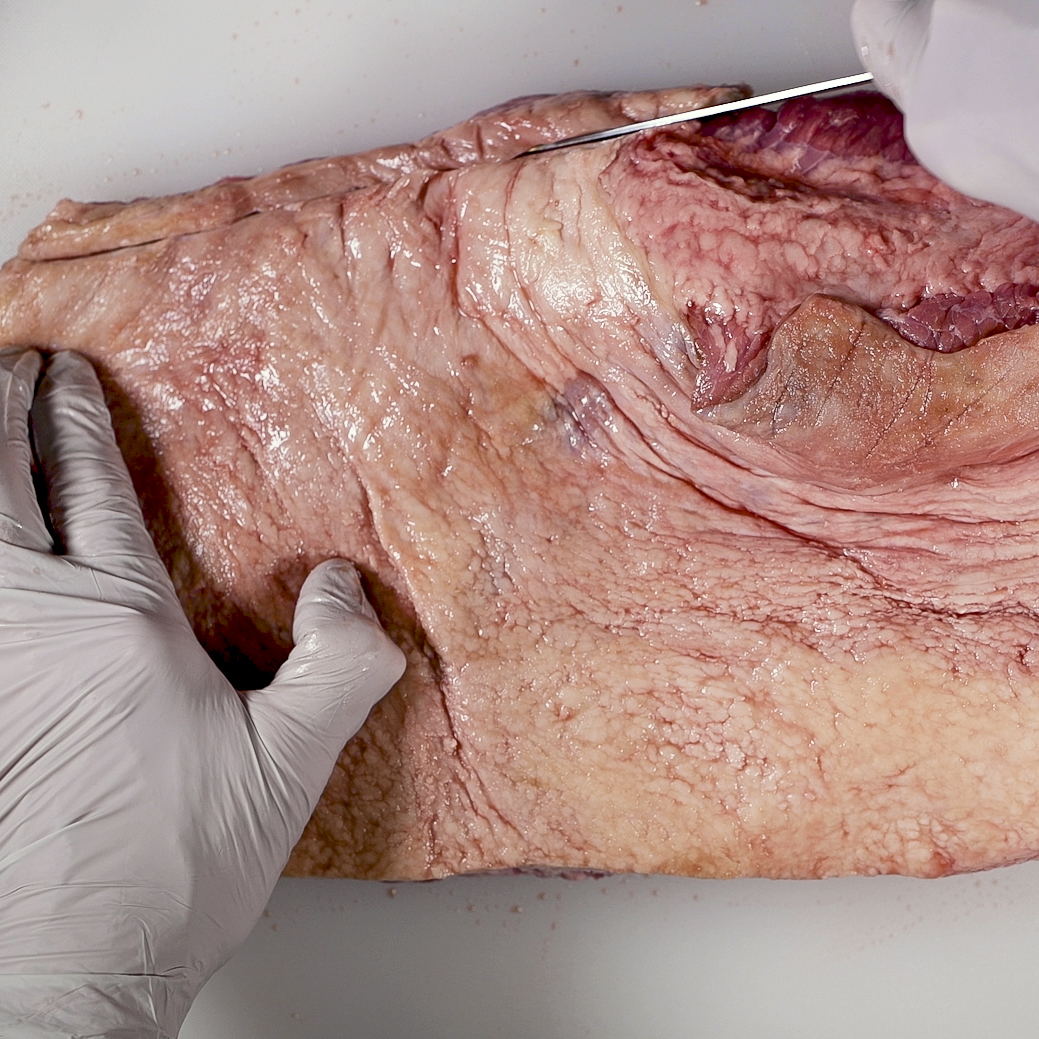
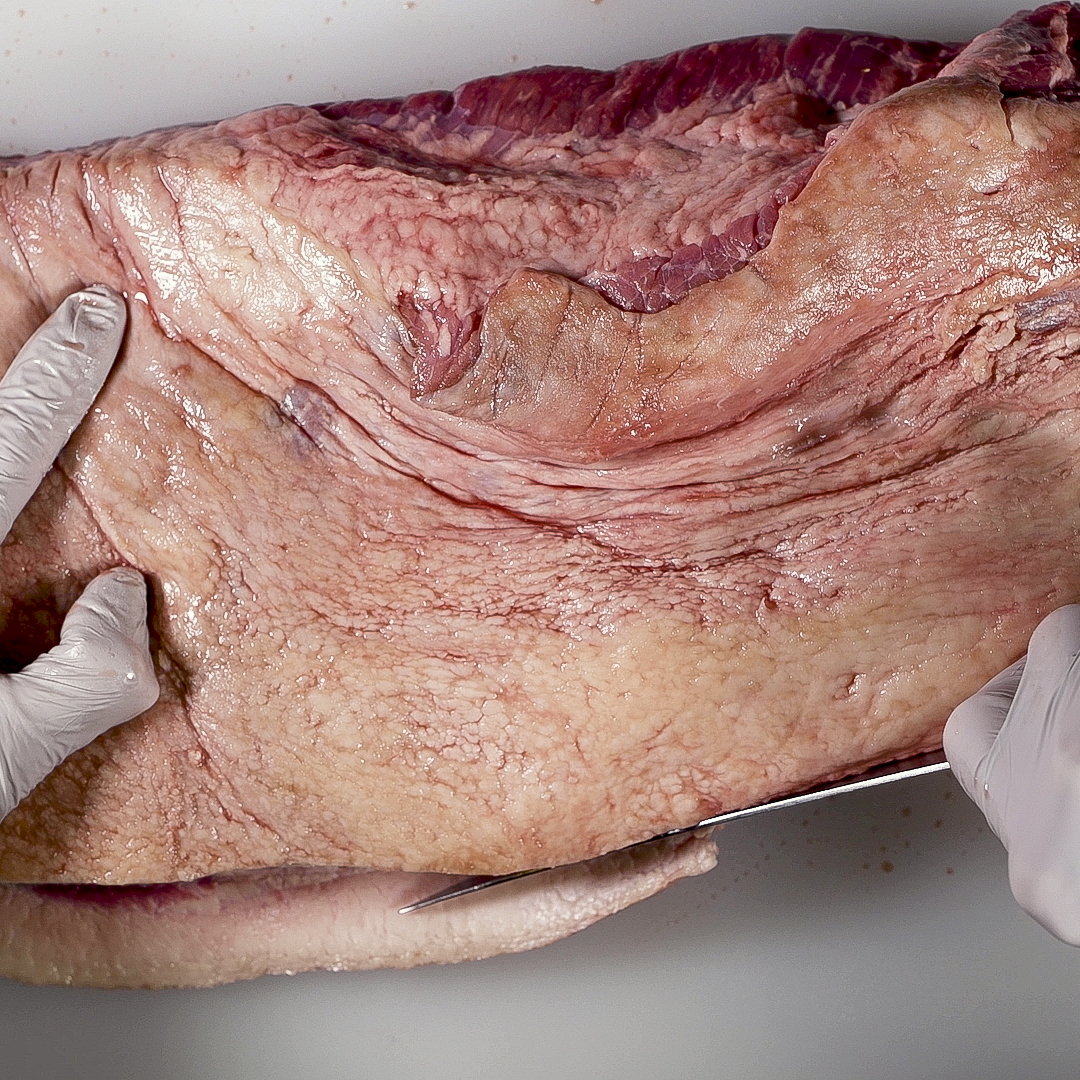
Next, look closely at the edges of the flat. Whole packer briskets aren't perfectly uniform. Sometimes you'll find a very thin flap or tapered section of meat hanging off one end. This is an important part of brisket trimming that can get overlooked. You're not just removing fat. You're trying to create a piece of meat with a reasonably consistent thickness so that it cooks more evenly.
In my video, How to Trim a Brisket, there was a section that was only ¾ inch thick. That piece wasn't going to survive a long brisket cook. By the time the thickest portions of the brisket were tender, that thin piece would have been overcooked or burned. So, I cut off any thin pieces along the edges. Round off sharp corners and feather irregular areas into the rest of the brisket. You don't want extremely thin edges and odd projections sticking out where they're likely to overcook.
Step 3: Clean Up the Meat Side
Flip the brisket over and examine the meat side.
Remove loose pieces of meat, silver skin and surface fat. Some of the fat can be pulled away by hand, while other areas require careful work with the knife. You don't need to scrape the meat perfectly clean. The idea is simply to clean up anything loose and expose a relatively clean surface that can take seasoning and smoke.
Step 4: Remove the Hard Fat
This is also where you'll begin encountering some of the large deposits of hard fat around the point.
Not all brisket fat is the same. Some of the softer fat will render during a long cook. But you'll also find thick, dense pieces of hard fat, particularly around the point and in the seam where the point and flat overlap. You can often feel the difference with your fingers. Hard fat is dense and firm, and some large pieces can be pulled away from the meat before you ever touch them with a knife. Thick deposits of hard fat generally won't render enough during the cook to become pleasant to eat, even during a long brisket cook. I trim those areas fairly aggressively.
Work slowly and remove a little at a time. You can always cut off more. You don't have to dig out every trace of fat between the point and flat, and you don't want to accidentally separate the two muscles. Just remove the large deposits that aren't going to improve the finished brisket.
Step 5: Trim the Fat Cap to About ⅜ to ½ Inch
Now flip the brisket so the fat cap is facing up. The goal is to leave approximately ⅜ to ½ inch of fat over the brisket.
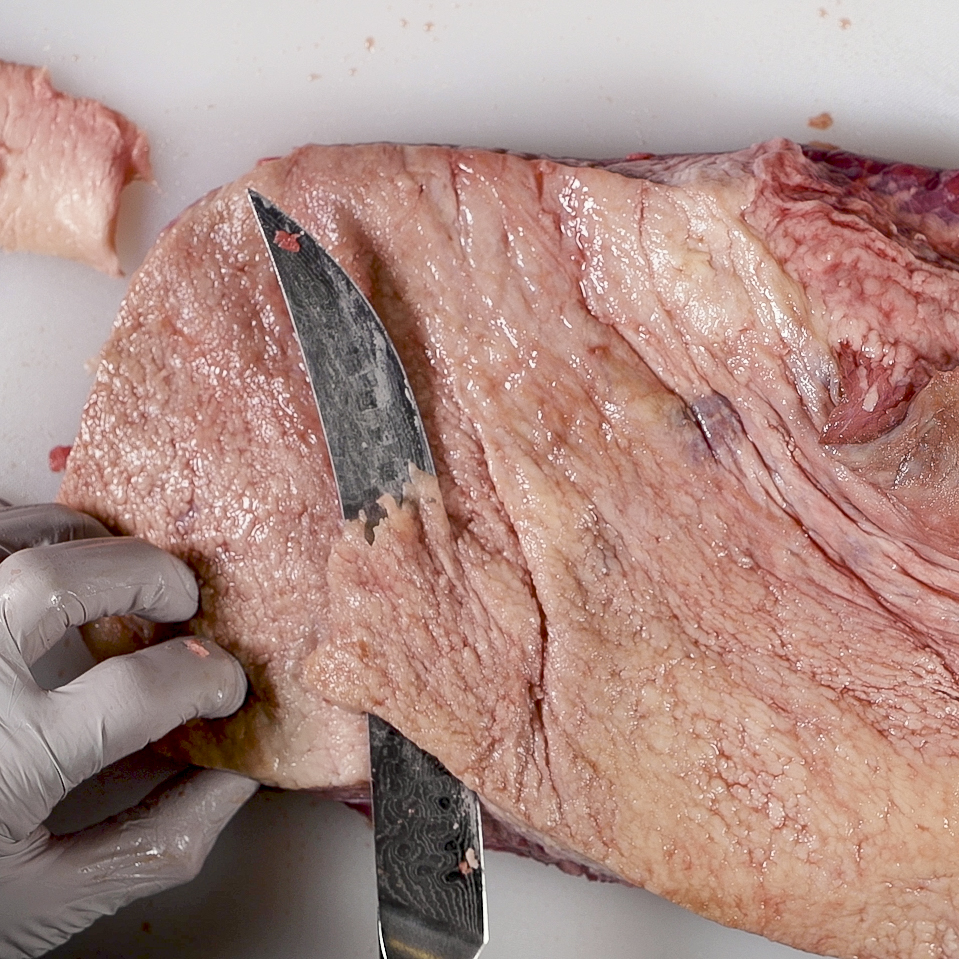
The fat cap is not the same thickness everywhere. That's one of the reasons to trim the edge at the beginning. You can use that exposed cross-section to see how much fat you're dealing with. Start shaving away the thick areas with shallow cuts. Keep your knife relatively flat and work gradually, rather than trying to remove a large slab of fat in one pass.
As you move around the brisket, you'll probably need to change the angle of the knife. On some parts of the brisket, the fat gets substantially thicker toward the edge. It's perfectly fine to angle the blade slightly to follow that contour. There may also be areas that need almost no trimming at all. If there's already only a modest layer of fat covering the meat, leave it alone. You want to end up with a relatively even fat layer.
Avoid Creating Bald Spots
One of the easiest mistakes to make while trimming the fat cap is cutting too deeply and exposing the meat underneath. I actually did exactly that in my Competition Brisket Masterclass video. I angled the knife too steep and cut all the way through the fat into a small section of meat. That's what I call a bald spot.
A small bald spot isn't going to ruin your brisket, so don't panic if you make one. But you don't want them all over the meat. Once you've removed the fat, there's no putting it back.
That's another reason to trim slowly and carefully. Every extra ounce you unnecessarily trim away is an ounce you won't be eating later. Make shallow cuts, check your progress and then take off more if necessary. You'll have much more control than you will trying to remove the entire excess fat cap in a few big cuts.
Step 6: Shape the Brisket
As you trim, pay attention to the overall shape of the brisket. You want the brisket relatively flat and uniform. That doesn't mean the point and flat need to be the same thickness, but you don't want unnecessary lumps of hard fat, paper-thin pieces of meat or jagged edges. Round sharp corners and feather thicker areas into thinner ones where appropriate. The final brisket should look cleaner and more uniform than the one you started with.
Step 7: Mark the Direction of the Grain
This is one of my favorite brisket trimming tricks, and it can mean the difference between a tough or tender brisket. Before the brisket goes onto the smoker, look at the flat and determine which direction the grain is running. It's easy to see now. It won't necessarily be easy to see after the brisket has spent hours in smoke and developed a dark bark.
Once you have identified the grain, cut a small wedge out of the corner of the flat at a 45-degree angle across the grain. That gives you a permanent marker showing where you need to begin slicing after the brisket is cooked. When it's time to serve, you don't have to stare at a dark piece of brisket trying to remember which direction the grain was running. The notch tells you.
Brisket should be sliced against the grain and that little notch makes identifying the grain considerably easier when the brisket is done.
Step 8: Clean Up the Fat Seam Between the Point and Flat
The final area to work on is the fat seam where the point and flat meet. You can usually see where the point begins overlapping the flat and feel the thick band of fat separating the two muscles. Carve into that seam enough to remove some of the hard fat and make the division between the two muscles easier to identify later. But don't go too far.
Remember, do not separate the point from the flat at this stage. You want to maintain the integrity of the whole packer brisket while it cooks. You're simply cleaning up the area and creating a visual reference that will make it easier to find the seam again later. That's particularly useful if you're planning to separate the point after cooking to make burnt ends.
What Should a Properly Trimmed Brisket Look Like?
When you're finished, don't worry about whether your brisket looks exactly like one you've seen in a barbecue competition or on YouTube. Every brisket is shaped differently and carries fat differently. Instead, look at what you've accomplished.
The extremely thin pieces that would have burned or dried out should be trimmed off. Loose meat and silver skin should be removed. Large deposits of hard fat should be substantially reduced. The fat cap should generally be around ⅜ to ½ inch thick, without a bunch of bald spots. The brisket should also have a reasonably smooth, uniform shape with the point and flat still intact. If that's what you're looking at, you're done trimming.
Common Brisket Trimming Mistakes
One of the biggest mistakes is thinking that more trimming means a better brisket. It doesn't. The objective isn't to remove as much as possible. It's to remove enough to promote an even cook.
Trimming the fat cap too aggressively can leave large areas of exposed meat. Work carefully and stop when you've reached roughly the thickness you're looking for.
Leaving large pieces of hard fat creates the opposite problem. Thick deposits of dense fat generally won't render enough during the cook to become pleasant to eat, so there's little reason to leave all of it attached.
Leaving extremely thin meat around the edges may give you a slightly heavier brisket going onto the smoker, but that doesn't mean you'll have more good brisket when it comes off. If a thin flap is going to turn into a dried-out piece of meat, I would rather remove it before cooking.
Forgetting to mark the grain won't hurt the cook, but it can make it hard to see where to slice against the grain. Make that little cut before seasoning and you'll know exactly where to start later.
And finally, trying to trim too quickly is probably responsible for more mistakes than anything else. Slow down, make small cuts, and look carefully at what you're doing. You can always take another pass.
Frequently Asked Questions About Trimming a Brisket
Technically, no. You can put an untrimmed brisket on a smoker and cook it. But I wouldn't recommend it. A whole packer brisket can have thick deposits of hard fat, uneven edges and thin sections that aren't going to cook particularly well. Trimming gives you considerably more control over the finished product. The objective is to remove what isn't going to help and leave what will.
Trim the fat cap to approximately ⅜ to ½ inch thick. Treat that as a target rather than a specification. Briskets aren't uniform, and neither are their fat caps. Some areas may require substantial trimming while others may already be where you want them.
The important thing is to avoid leaving extremely thick deposits of fat while also avoiding unnecessarily exposing the meat underneath by cutting away too much.
No. Just trim some of the hard fat from the seam between the point and flat and expose the seam enough that you can find it again later, but leave the whole packer intact for the cook. If you're making burnt ends, you can separate the point from the flat later after cooking.
You can, but you don't have to. The important thing is to keep the brisket properly refrigerated until you're ready to trim it. Cold brisket is easier to trim because the fat is firmer. Whether you're trimming immediately before seasoning or doing the prep earlier, work with the brisket while it's cold.
Don't throw away all that brisket fat! The clean fat trimmings can be rendered into beef tallow and used for cooking. I use beef tallow when cooking brisket, and making your own from the fat you've already trimmed is a great way to put those trimmings to use.
I'll cover the complete process in my video Don't Throw Away That Fat - Make Beef Tallow on the Kamado Joe.
Final Thoughts
Trimming a brisket isn't about making it look perfect. The goal is to give yourself a better piece of meat to put on the smoker. Remove the thin sections that are likely to dry out, get rid of the hard fat that isn't going to render, leave roughly ⅜ to ½ inch of the fat cap, and shape the brisket so it will cook as evenly as possible.
Most importantly, use a sharp knife and take your time. You can always trim a little more, but you can't put meat or fat back once you've cut it away. A small bald spot or an imperfect edge isn't going to ruin your brisket.
A good trim gives the brisket a better shape for cooking and helps it cook more evenly end to end. Follow the natural shape of the meat and focus on removing only what won't contribute to the finished brisket. Finally, knowing How to Tell When a Brisket is Done is just as important as getting the trim right.
Leave a Reply