
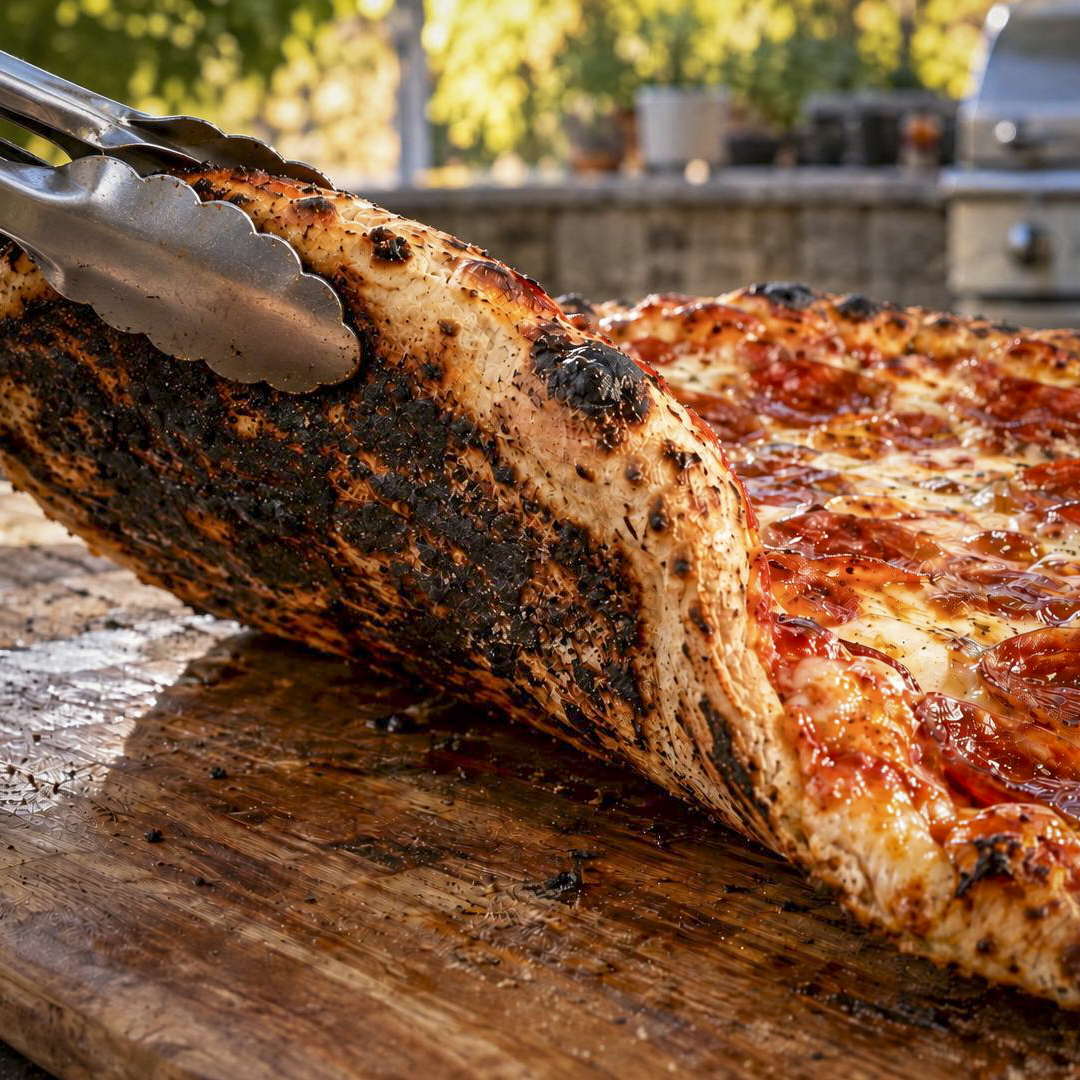
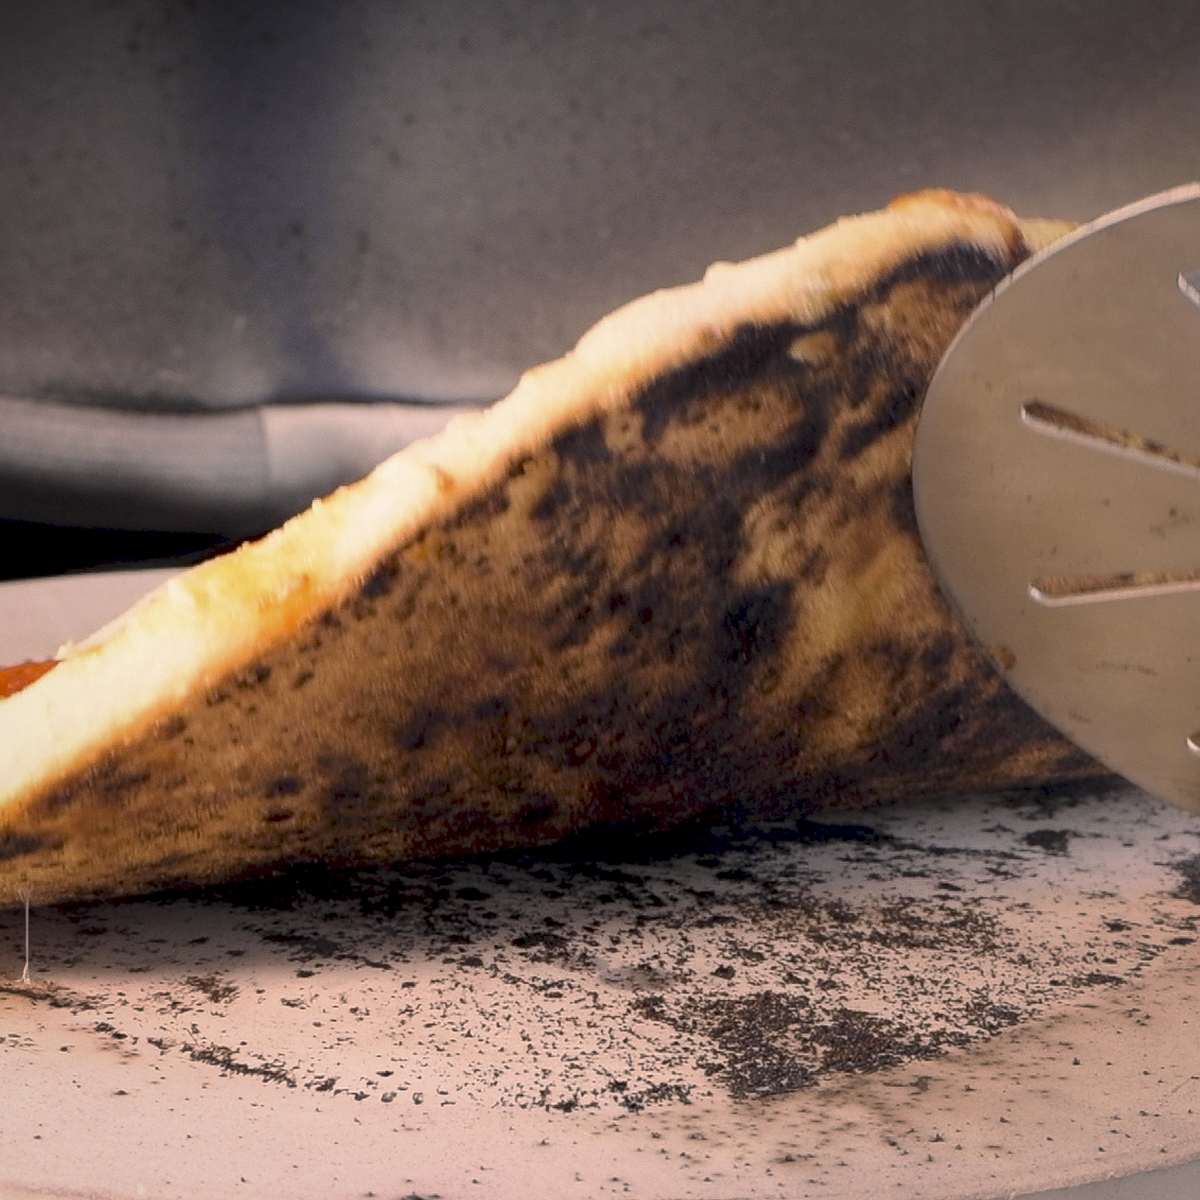
If the bottom of your pizza burns before the cheese melts and the rim and toppings finish cooking, the pizza stone is delivering heat to the bottom of the pizza faster than the dome delivers heat to the top. Solving this problem takes three changes: placing the heat deflector plates below the pizza stone, raising the pizza stone into the dome, and using a dough with the right hydration. In this post, I'll explain each change and walk you through my Kamado Joe pizza setup.
Jump to:
How a Kamado Joe Heats a Pizza
A Kamado Joe heats a pizza from two directions, but the heat reaches the bottom and top of the pizza differently. The burning charcoal heats the pizza stone, which transfers heat directly to the crust. At the same time, the ceramic dome absorbs heat and radiates it back toward the cheese and toppings. Because the crust sits directly on the pizza stone, it receives heat faster than the cheese and toppings, which rely on radiant heat from the dome. When the pizza stone sits at grate level, close to the fire, the bottom crust can burn before the cheese melts and the rim and toppings finish cooking.
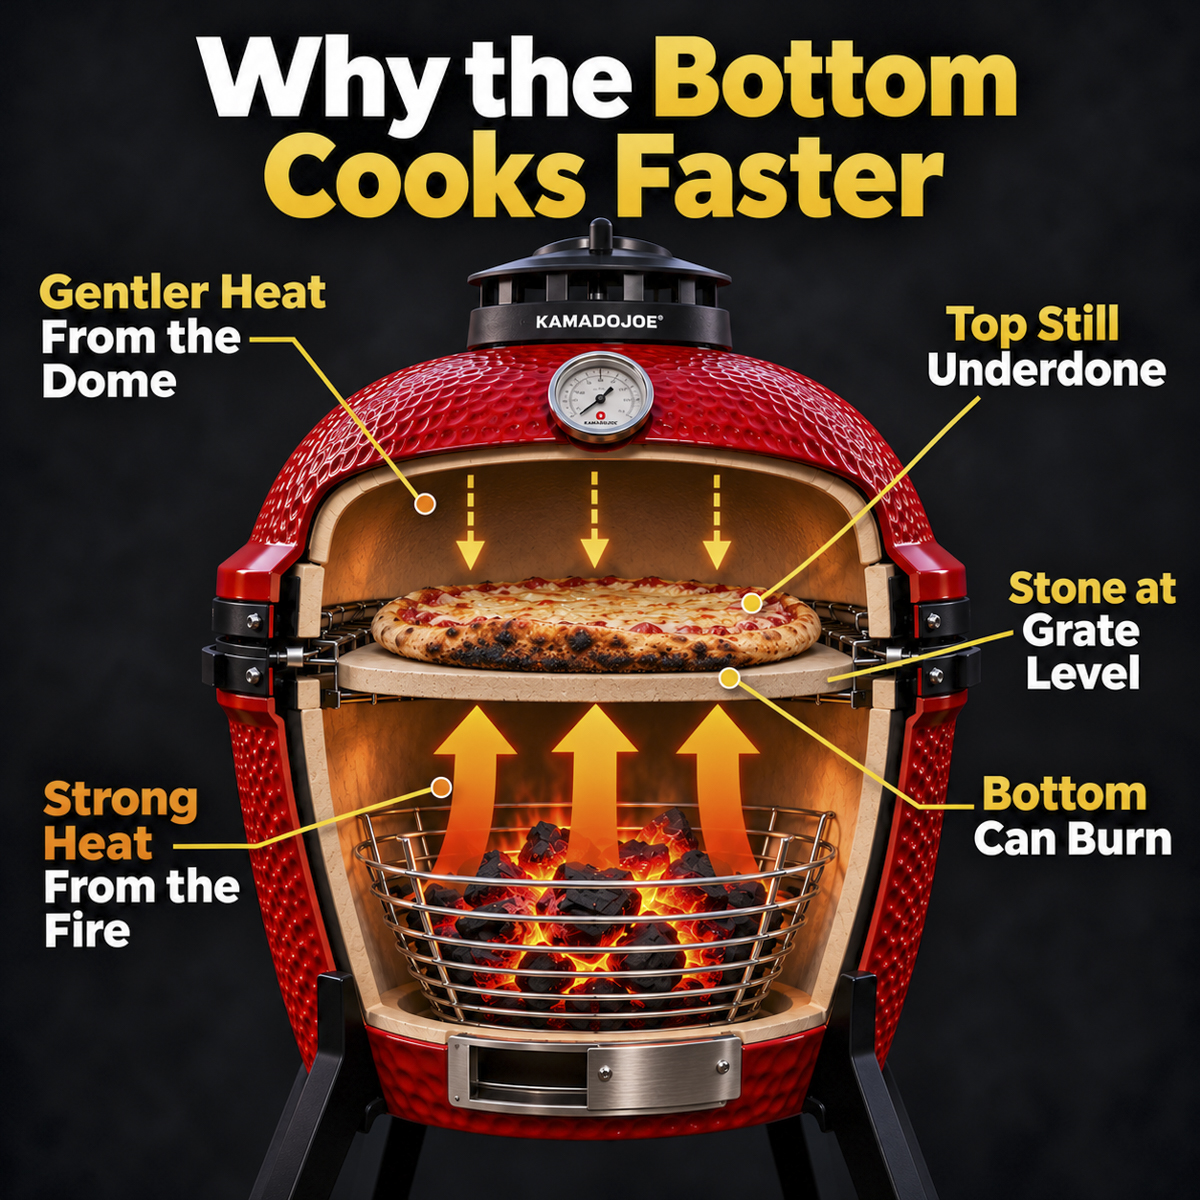
Three Keys to Keeping the Bottom From Burning
1. Shield the Pizza Stone With the Heat Deflector Plates
The ceramic heat deflector plates sit between the burning charcoal and the pizza stone. The deflector plates block the radiant heat rising from the charcoal, and hot air flows around their edges to heat the pizza stone. Without the deflector plates, the pizza stone absorbs intense heat from the burning charcoal and transfers it directly to the crust, causing the bottom to cook too quickly and burn. With the deflector plates in place, the pizza stone heats more gently, so the crust bakes more slowly. On the Kamado Joe Classic II, the deflector plates rest on the Divide & Conquer rack at grate level.
2. Raise the Pizza Stone Into the Dome
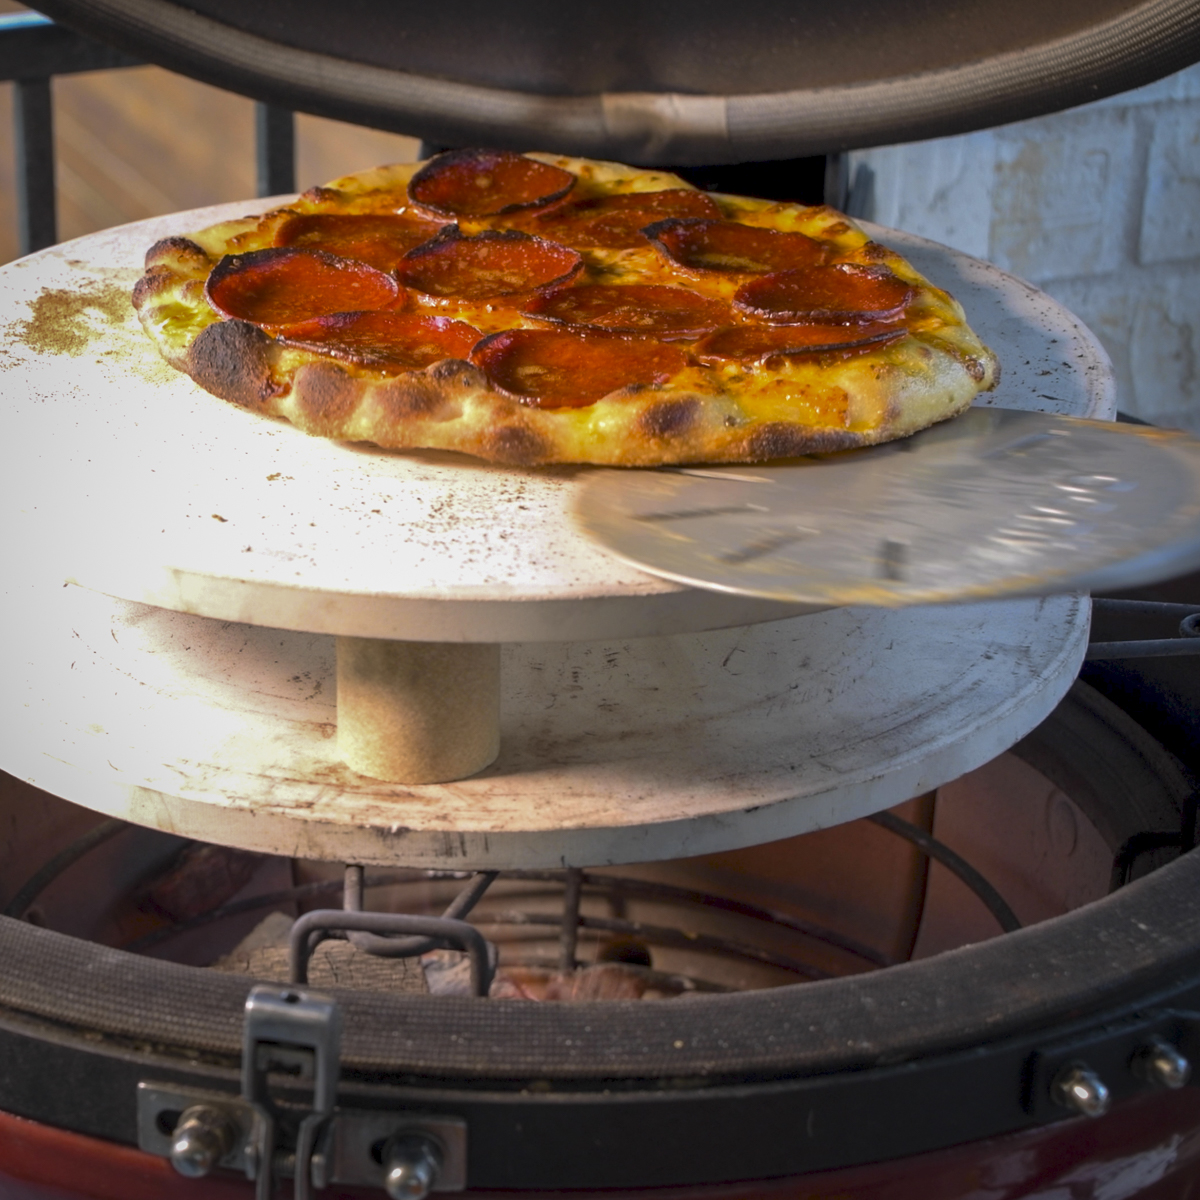
Raising the pizza stone above the heat deflector plates moves the pizza closer to the dome, where hot air and radiant heat reach the top of the pizza. That additional heat from above melts the cheese and browns the rim while the crust bakes on the pizza stone. The space beneath a raised pizza stone is important too, because hot air needs to circulate under the pizza stone to heat it evenly. My first attempt at this setup showed me what happens when that space is blocked.
In my previous video, Amazing Pizza Without a DoJoe, I set the pizza stone on a disposable aluminum pan placed on the heat deflector plates. The pan gave the pizza stone the height it needed, but the pan blocked hot air from reaching the underside of the pizza stone. As a result, the pizza stone heated mainly around the edges while the center took almost 40 additional minutes to reach the same temperature. That experience showed me that the pizza stone needs both elevation and airflow.
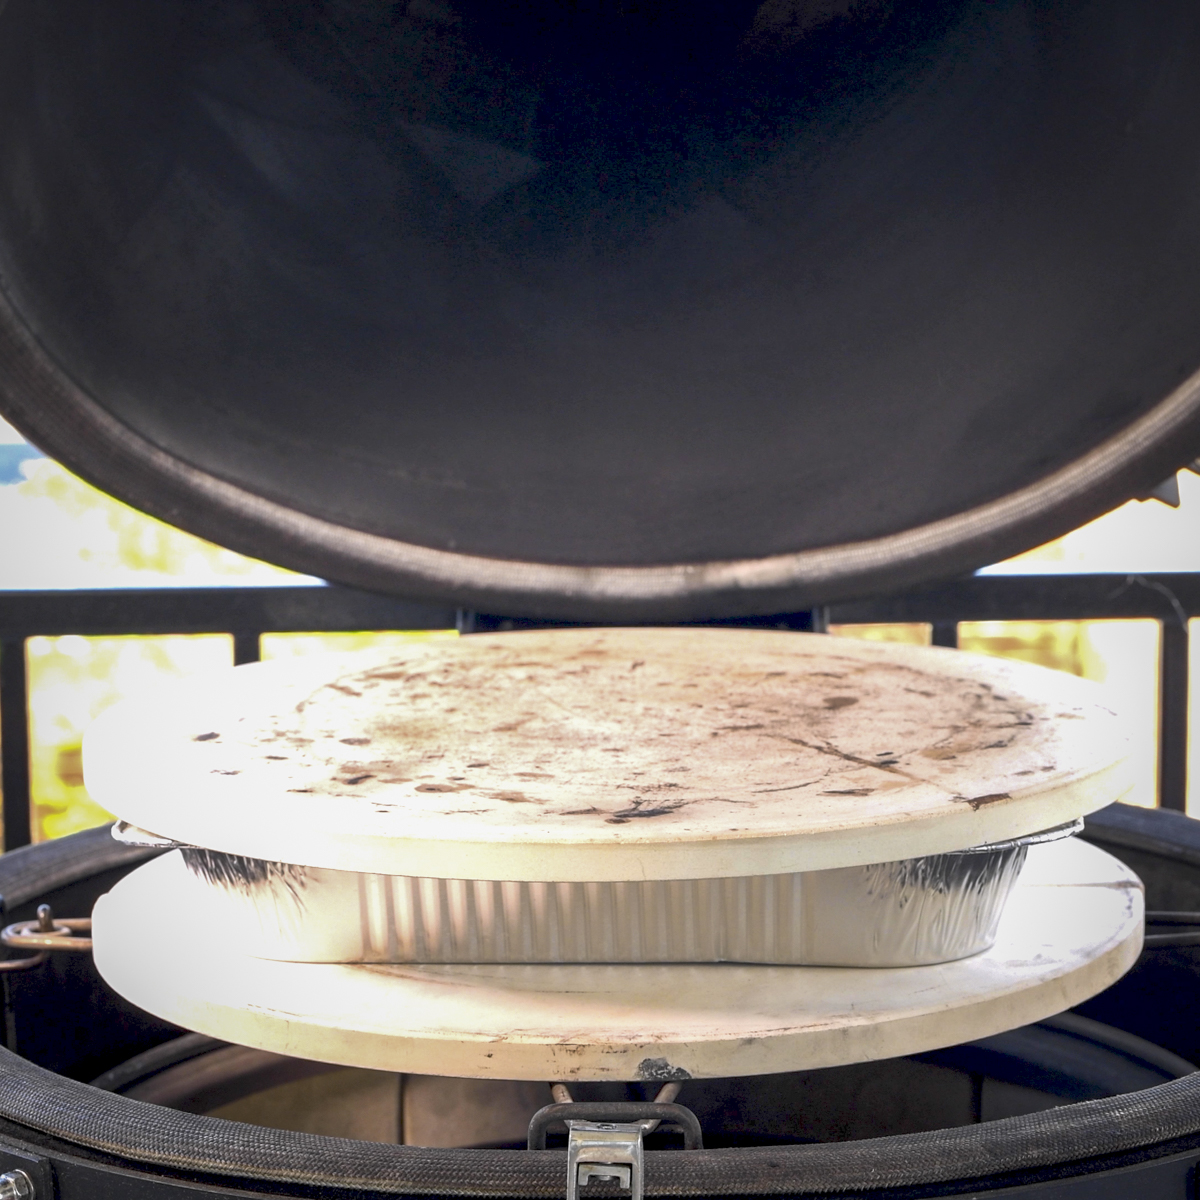
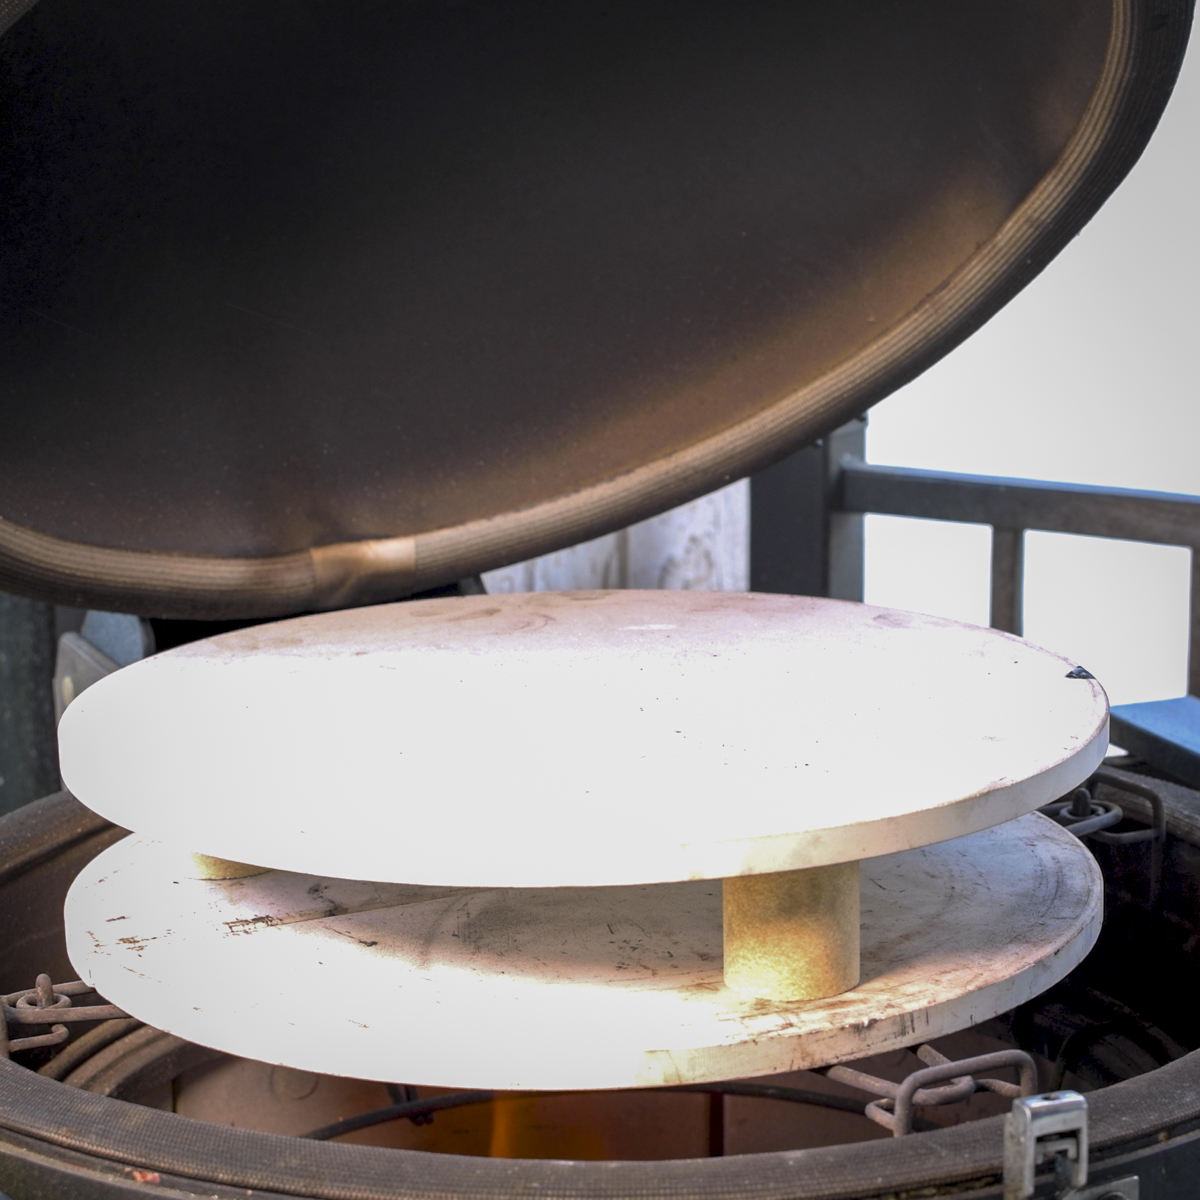
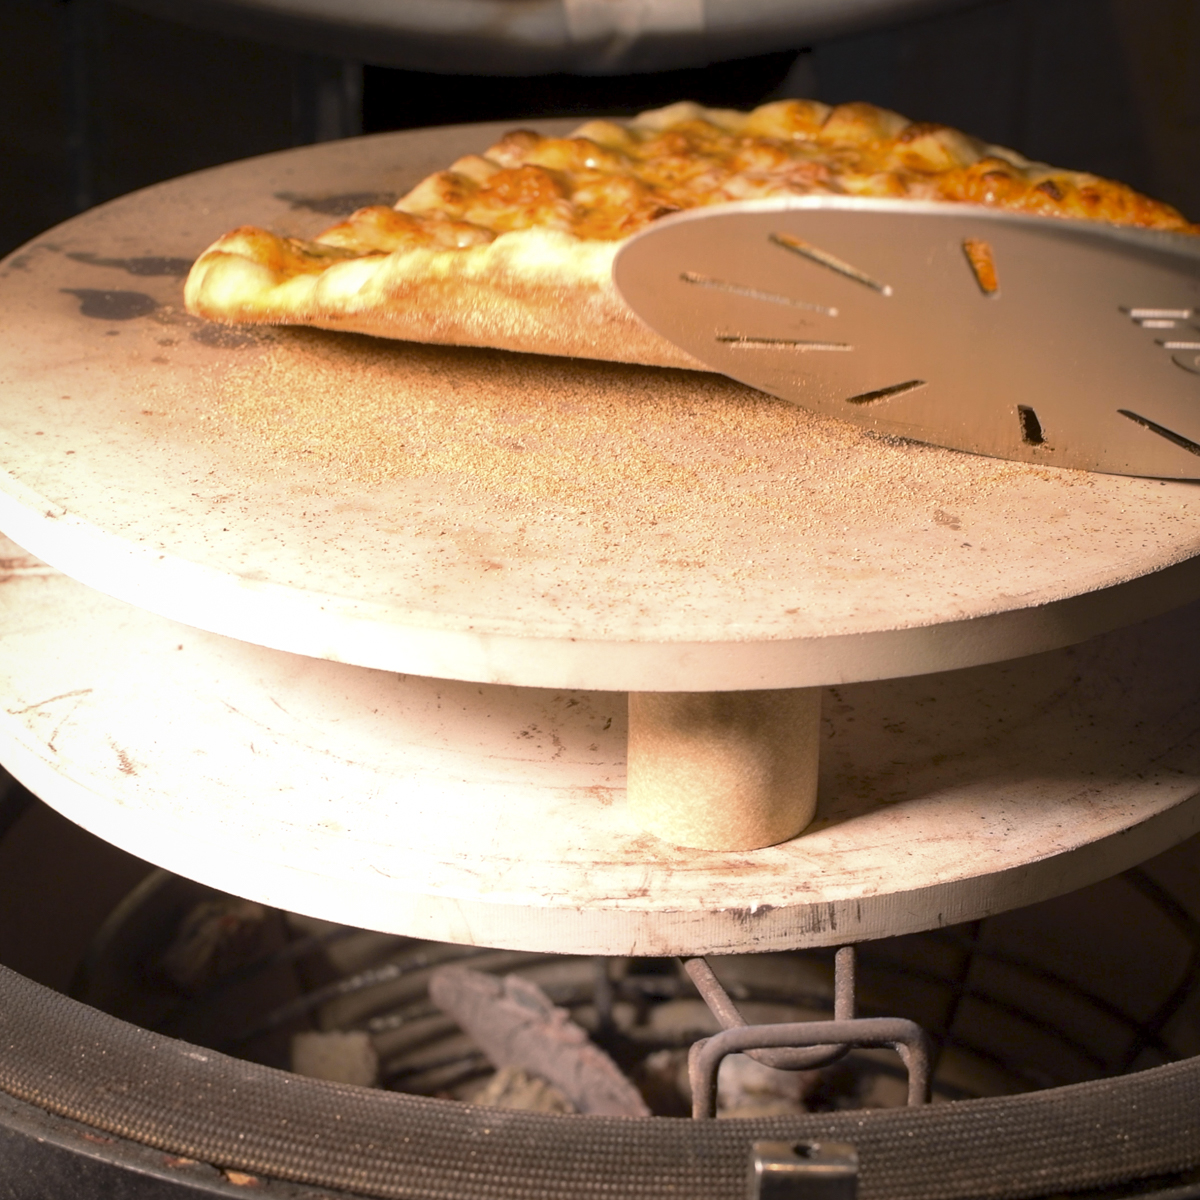
In my revised setup, three 2-inch ceramic kiln spacers hold the pizza stone above the deflector plates without blocking the airflow beneath it. The wide gaps between the spacers allow hot air to circulate under the pizza stone, so the whole pizza stone reaches the same temperature. Because the pizza stone is evenly heated, the center of the crust browns at the same rate as the edges.
3. Use a Dough With the Right Hydration
The dough's hydration and whether it contains sweeteners both affect how the crust bakes and browns. Hydration is the weight of the water in a dough relative to the weight of the flour. A dough with 70 percent hydration, for example, contains 70 grams of water for every 100 grams of flour. For pizza baked at 550°F, I recommend a dough recipe with 65 to 70 percent hydration.
For flour, I use Caputo Pizzeria 00, an Italian flour formulated for pizza. The "00" refers to how finely the flour is milled. It makes a smooth dough that stretches thin without tearing. You'll find a link to the flour at the end of this article.
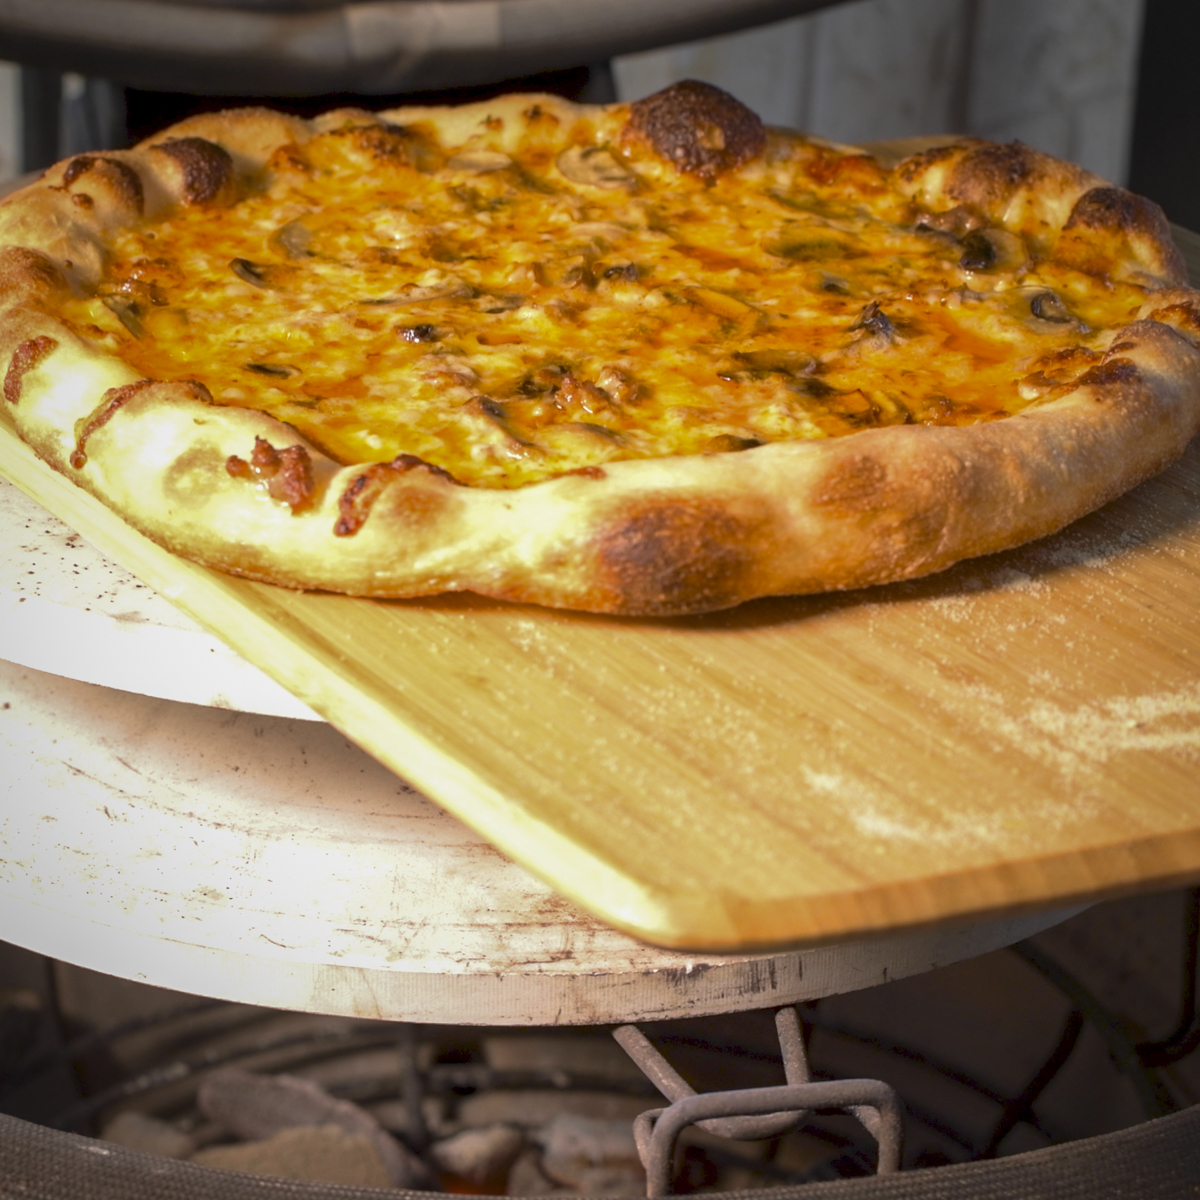
The recipe I use is Ken Forkish's 24 to 48 Hour Pizza Dough, from his book The Elements of Pizza. The dough has 70 percent hydration, and Forkish describes it as easy and forgiving. The slow fermentation develops flavor and gives the crust a light, tender, airy texture. It's one of the best doughs I've ever made. I make the dough a day before I cook and bake it after 24 hours of refrigerator time. At 550°F on my Kamado Joe, it produces a crisp, golden crust with a puffed rim.
You'll find the full recipe at Overnight Pizza Dough for a Pizza Stone in a Conventional Oven. If you'd prefer to use a different dough, check the ingredient list and choose one without honey or sugar. Sugar browns quickly at high heat, so a sweetened dough can burn on the bottom before the cheese melts.
What You'll Need
Equipment
- Kamado Joe Classic II (see the clearance note below for other sizes)
- Divide & Conquer rack
- Both ceramic heat deflector plates
- Pizza stone
- Three 2-inch ceramic kiln spacers
- Large lump charcoal
- Infrared thermometer
- Pizza peel
- Bench scraper
- Heat-resistant gloves
- Wire cooling rack
Ingredients
- 24 to 48 Hour Pizza Dough, three dough balls (recipe linked above)
- Pizza or marinara sauce
- Shredded whole-milk mozzarella
- Coarse semolina flour for the peel
- Your choice of toppings
The ceramic kiln spacers are designed to support shelves in pottery kilns, so they withstand temperatures far higher than a grill reaches. Because the spacers raise the pizza stone 2 inches closer to the dome, test the setup with the grill cold. Close the dome slowly and make sure the pizza stone clears both the sides of the dome and the thermometer stem, especially if you're using a grill other than the Classic II.
Stabilize the Temperature at 550°F
The target temperature is 550°F on the dome thermometer. When the dome temperature reaches 500°F, leave the bottom vent wide open and swivel the top of the Kontrol Tower two-thirds closed. This slows the temperature rise and helps prevent the grill from overshooting the target temperature. Allow 8 to 10 minutes for the grill to stabilize, then fine-tune the top vent until the dome temperature holds steady at 550°F.
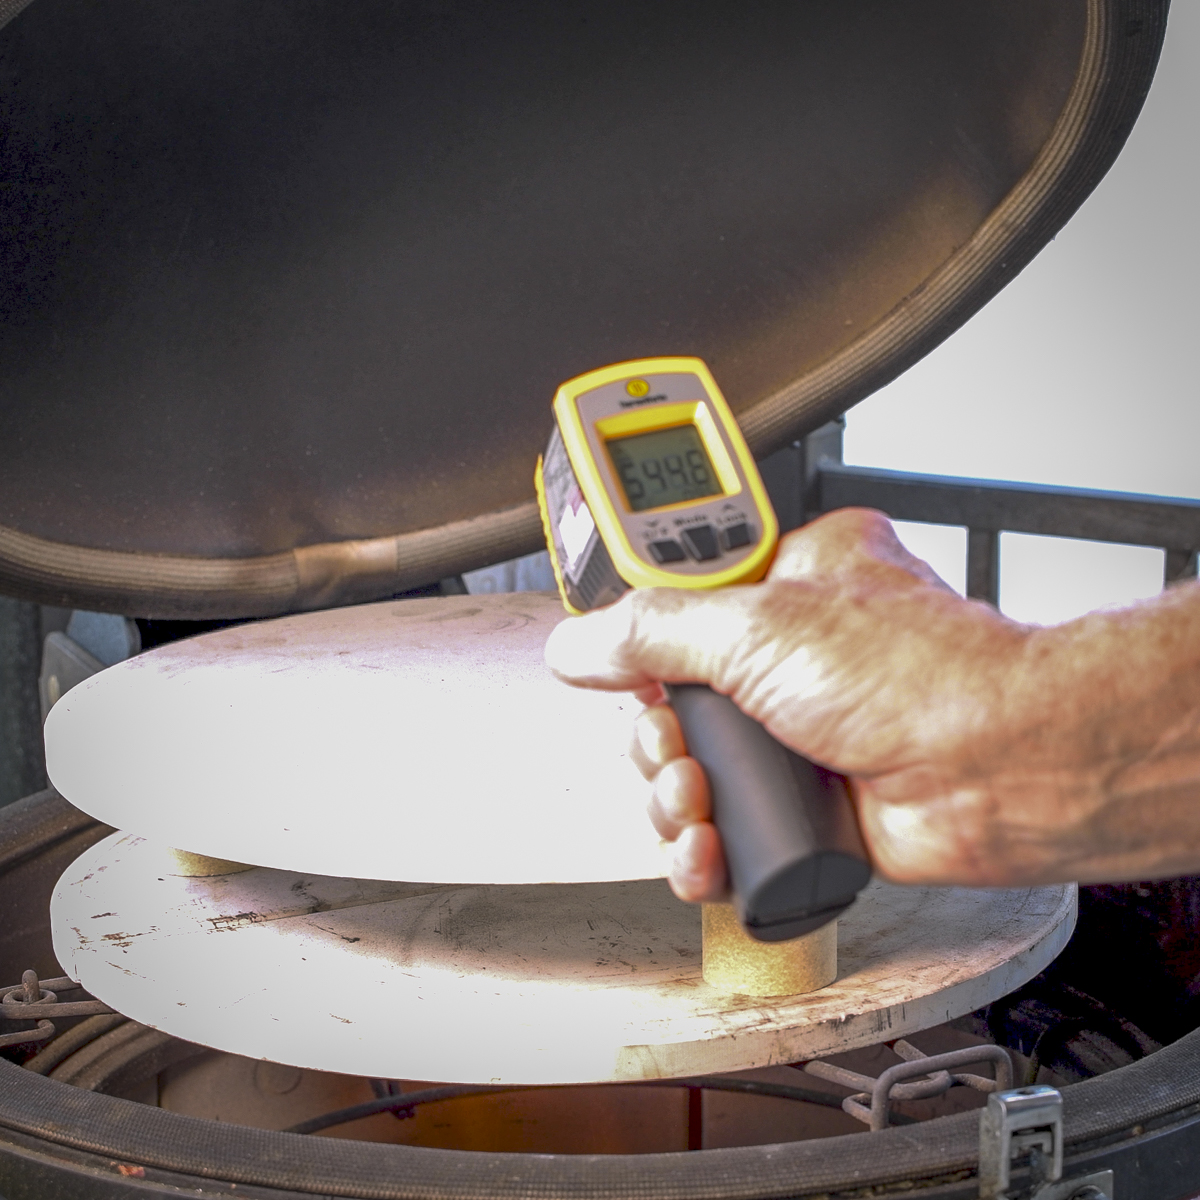
Once the dome temperature is stable, let the pizza stone heat-soak for 45 minutes to allow the heat to penetrate all the way through. The dome thermometer measures the air temperature inside the dome, not the surface of the pizza stone, so the two readings can differ. Use an infrared thermometer to check the pizza stone on the left, right, and center to make sure it is heating evenly. The center reading tells you when the pizza stone has heated through. When the center reaches 550°F, you can begin cooking.
Shape the Dough and Top the Pizza
Take the dough balls out of the refrigerator 45 to 60 minutes before baking so they can warm up and the gluten can relax while the pizza stone heat-soaks. When you pick up a dough ball, you'll notice that the top feels slightly drier than the bottom. Keep track of that drier side as you stretch the dough, because it will go face down on the pizza peel.
Lightly flour your work surface and use your fingertips to press the center of the dough outward, leaving a defined rim around the edge. Then lift the dough by the rim and rotate it, letting its weight stretch the center. Finish by draping the dough over your knuckles and gently stretching it into a 12-inch round. The dough should have a thin center and a puffy rim all the way around.


Dust a pizza peel with coarse semolina flour, spreading it in an even layer. The semolina acts like tiny ball bearings, helping the pizza slide off the peel easily. I don't use cornmeal, because it can burn during baking and give the pizza a burned corn flavor. Place the dough on the peel with the drier side down. Shake the peel to confirm the dough slides freely before you add the toppings.
Top the pizza with a thin layer of sauce. My preference is to blend canned San Marzano tomatoes with a little kosher salt. Although jarred marinara sauce is a convenient choice, and it tastes surprisingly good on homemade pizza. Next, arrange your cheese and toppings. Keep them light so the pizza cooks evenly and the toppings are done when the crust is. Too many toppings also make the pizza much harder to slide off the peel.
Bake the Pizzas
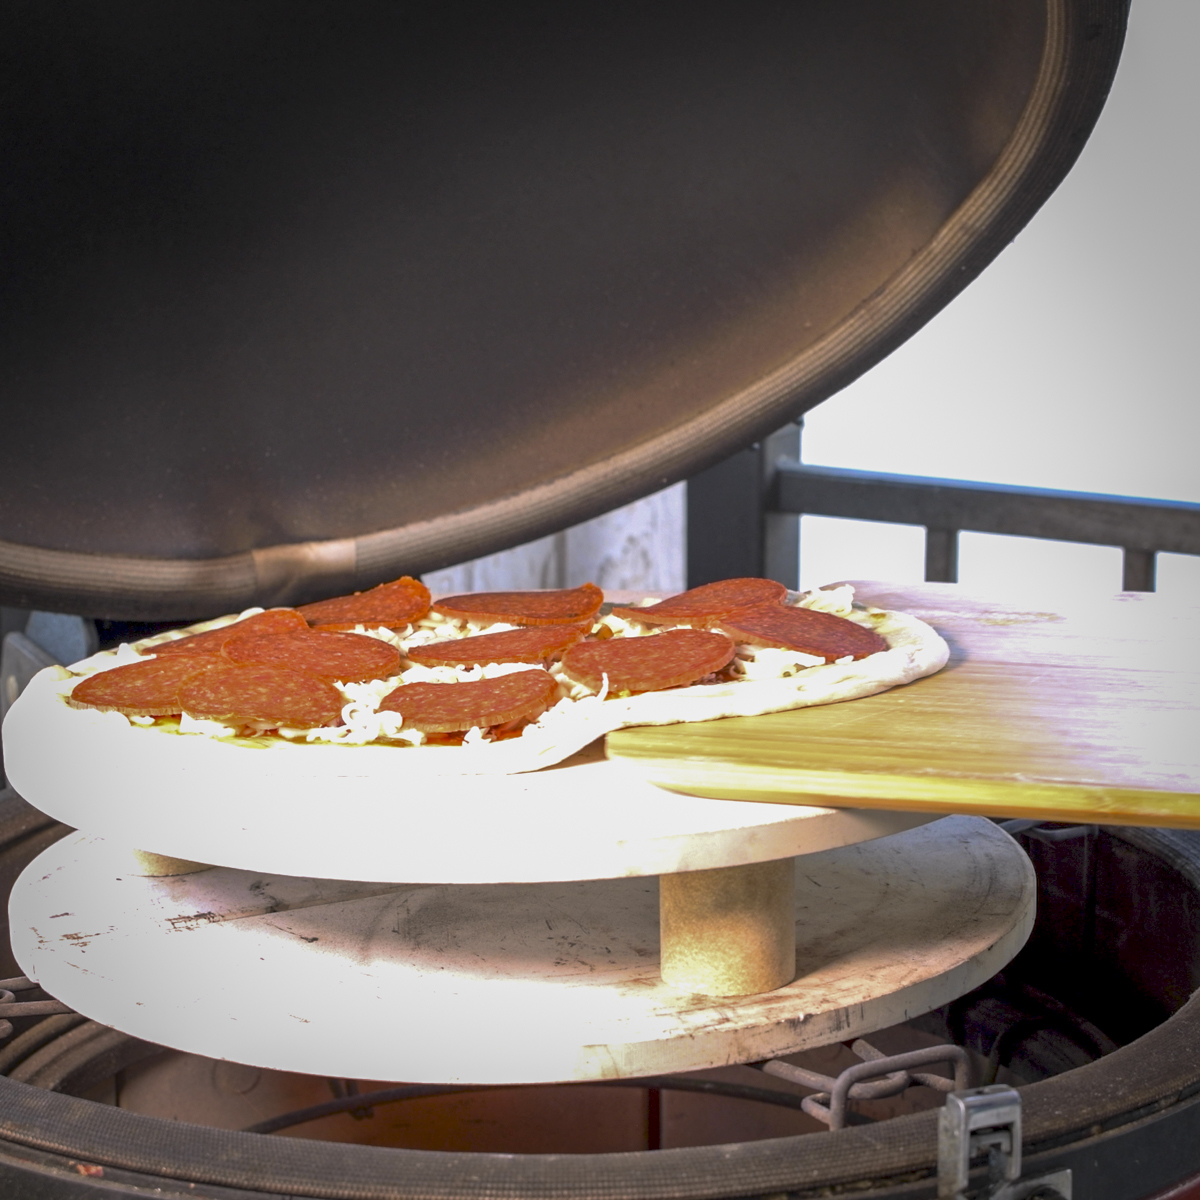
To reduce the risk of a flashback, burp the grill before you open the dome fully by lifting the dome 1 to 2 inches for a few seconds. Then slide the pizza onto the center of the pizza stone and close the dome. Plan on a total cooking time of 7 to 8 minutes, rotating the pizza once at about the halfway point to promote even browning. When you turn the pizza, look for cheese that's melted edge to edge, with the first amber spots beginning to appear. Lift an edge with the peel and check the bottom for an even, golden-brown color.
Remove the pizza when the rim is puffed and golden, the cheese is fully melted with light browning, and the bottom is an even golden brown. Let the pizza rest on a wire rack for 1 to 2 minutes to keep the bottom crisp. Then slice and serve.
After each pizza, use a bench scraper or spatula to remove any toasted semolina from the pizza stone. Leftover semolina can scorch and stick to the bottom of the next pizza. Then close the dome and allow 5 to 6 minutes for the pizza stone to return to temperature. Use an infrared thermometer to confirm the center of the pizza stone has reached 550°F.
Quick Reference
| Step | Setting |
| Shield the pizza stone | Heat deflector plates on the Divide & Conquer rack at grate level |
| Raise the pizza stone | Three 2-inch ceramic kiln spacers on the heat deflector plates, pizza stone centered on top |
| Dough | Forkish's 24 to 48 Hour Pizza Dough, Caputo Pizzeria 00 flour, 70 percent hydration, baked after 24 hours; out of the refrigerator 45 to 60 minutes before baking |
| Vents | Bottom fully open; Kontrol Tower top two-thirds closed at about 500°F |
| Dome temperature | Stable at 550°F |
| Heat soak | 45 minutes; pizza stone center at 550°F by infrared thermometer |
| Bake | Burp the grill; 7 to 8 minutes, one turn at the halfway point |
| Rest | 1 to 2 minutes on a wire rack |
| Between pizzas | Scrape the pizza stone; 5 to 6 minutes to return to temperature |
How It All Works Together
The complete setup changes how heat reaches the pizza. The heat deflector plates reduce the heat reaching the bottom crust, and the raised pizza stone moves the pizza closer to the dome, where more heat reaches the top. The airflow beneath the pizza stone helps it heat evenly from edge to center. A dough without sweeteners keeps the crust from browning too quickly at 550°F. To see the setup in action, watch the video below.
Frequently Asked Questions
Stabilize the dome at 550°F, then let the pizza stone heat-soak for 45 minutes. The pizza stone is ready when the center reads 550°F on an infrared thermometer.
Yes. The heat deflector plates block direct heat from the burning charcoal, so the crust bakes more slowly and doesn't burn before the cheese melts and the toppings finish cooking.
I raise the pizza stone 2 inches above the heat deflector plates with three ceramic spacers. The extra height moves the pizza closer to the dome, and the gaps between the ceramic kiln spacers let hot air circulate under the pizza stone. On grills other than the Classic II, test the setup with the grill cold to make sure the pizza stone clears the dome.
Dough made with honey or sugar browns quickly at high heat, so the crust can burn before the cheese melts. For pizza baked at 550°F, I recommend a dough without sweeteners and with 65 to 70 percent hydration.
At 550°F, a pizza bakes in 7 to 8 minutes. Turn it once at about the halfway point so the crust browns evenly.
Where to Buy
The products below are the exact items referenced in this guide. Using these links supports testing and recipe development at no extra cost to you. Affiliate Disclosure: As an affiliate, I earn from qualifying purchases. I only recommend products I use in my own cooks.
Other Resources
If you found this guide helpful, here are a few more resources that will help you get the most out of your Kamado Joe:
- Kamado Joe Owner's Handbook
- The Texas Backyard Kitchen - Complete Meals from Fire to Table
- Kamado Joe 101 Playlist
- How to Control Temperature on a Kamado Joe
Recipe source: Forkish, Ken. The Elements of Pizza: Unlocking the Secrets to World-Class Pies at Home. Ten Speed Press, 2016.
Leave a Reply