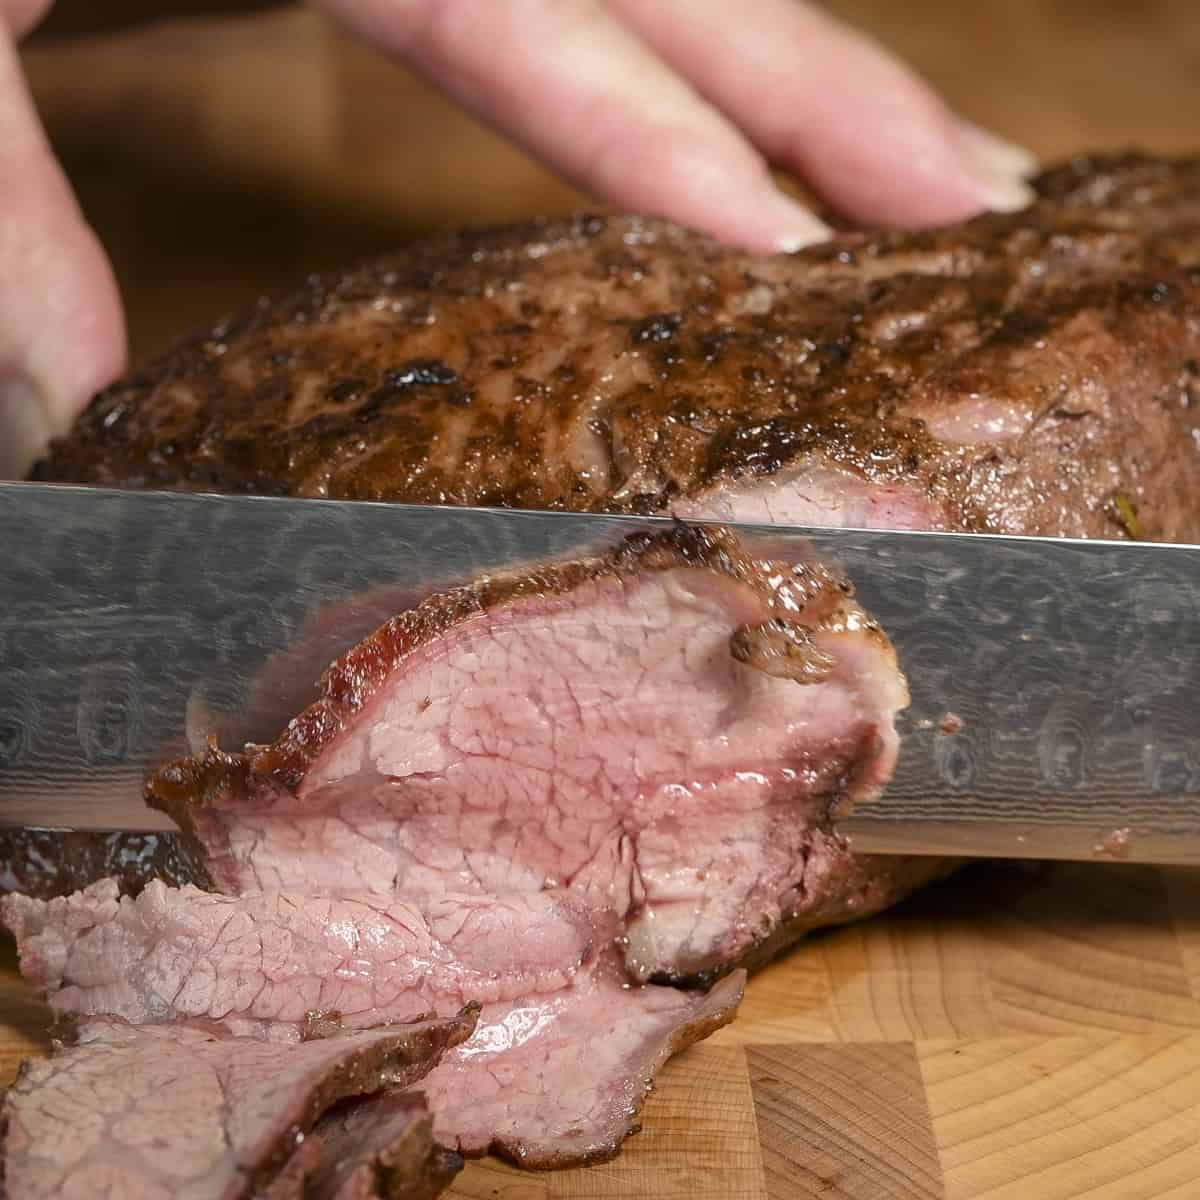
Cutting a steak against the grain is an essential technique for achieving tender meat, especially when working with tougher cuts like skirt steak, flank steak and flat iron steak. In this step-by-step guide, we explore the importance of cutting meat against the grain, discuss how to identify the direction of the muscle fibers and review how to make precise cuts for the best results.
Why Cutting Against the Grain Matters
The grain of the meat refers to the direction in which the muscle fibers run. Long muscle fibers can make a steak chewy and tough when not cut against the grain. Cutting meat perpendicular to the long muscle fibers, or across the grain, breaks the fibers into shorter pieces, making the meat easier to chew. This is particularly important for tougher cuts of meat that contain more connective tissue.
Try my recipes for The Best Cuts of Steak to Cook in a Cast-Iron Skillet, Seared Flat Iron Steak with a Red Wine Marinade and How to Cook a Reverse Seared Texas T-Bone Steak.
Jump to:
Identifying the Grain Direction Before Cooking
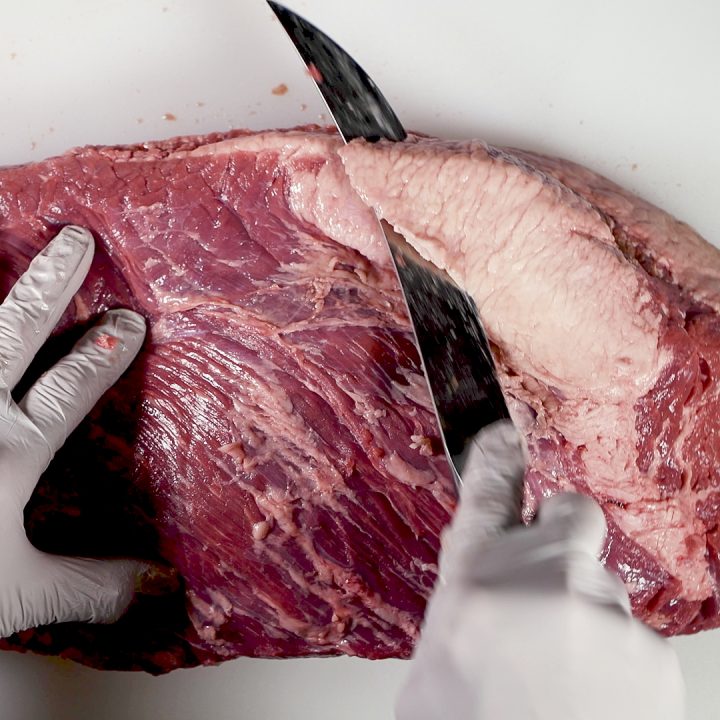
It's important to examine the entire piece of meat to identify the grain direction before cooking. After cooking, it can be hard to see. The muscle fiber grain runs in straight lines. Take a close look at the surface of the raw meat and look for long lines running lengthwise. On tough cuts of meat, such as in skirt steak or flank steak, the fibers can look almost like wood grain. For cuts like a brisket or a hanger steak, the grain direction may change between different muscle groups.
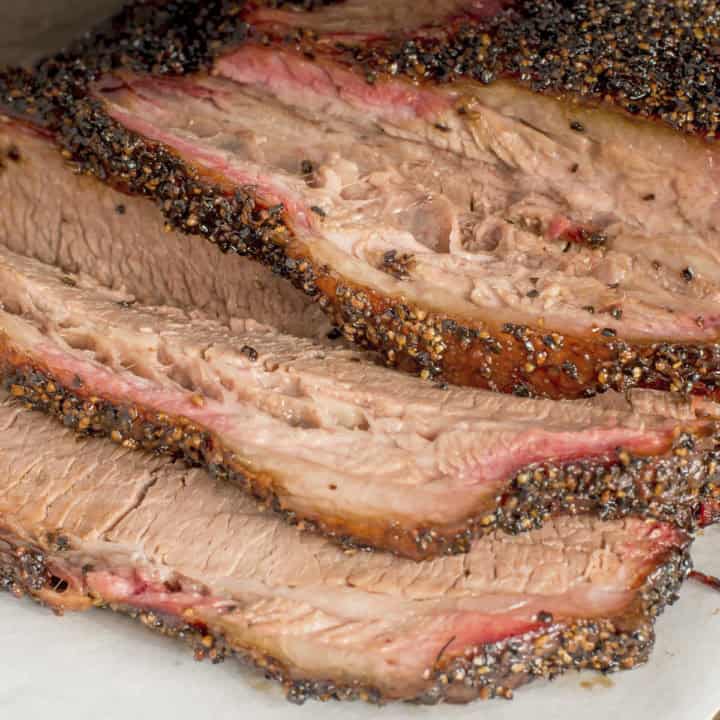
For large cuts, like a brisket flat, cut off a small section of the thinnest part at a 45° angle to the grain. That notch will be visible after cooking and will help orient you to the grain direction when it comes time to slice.
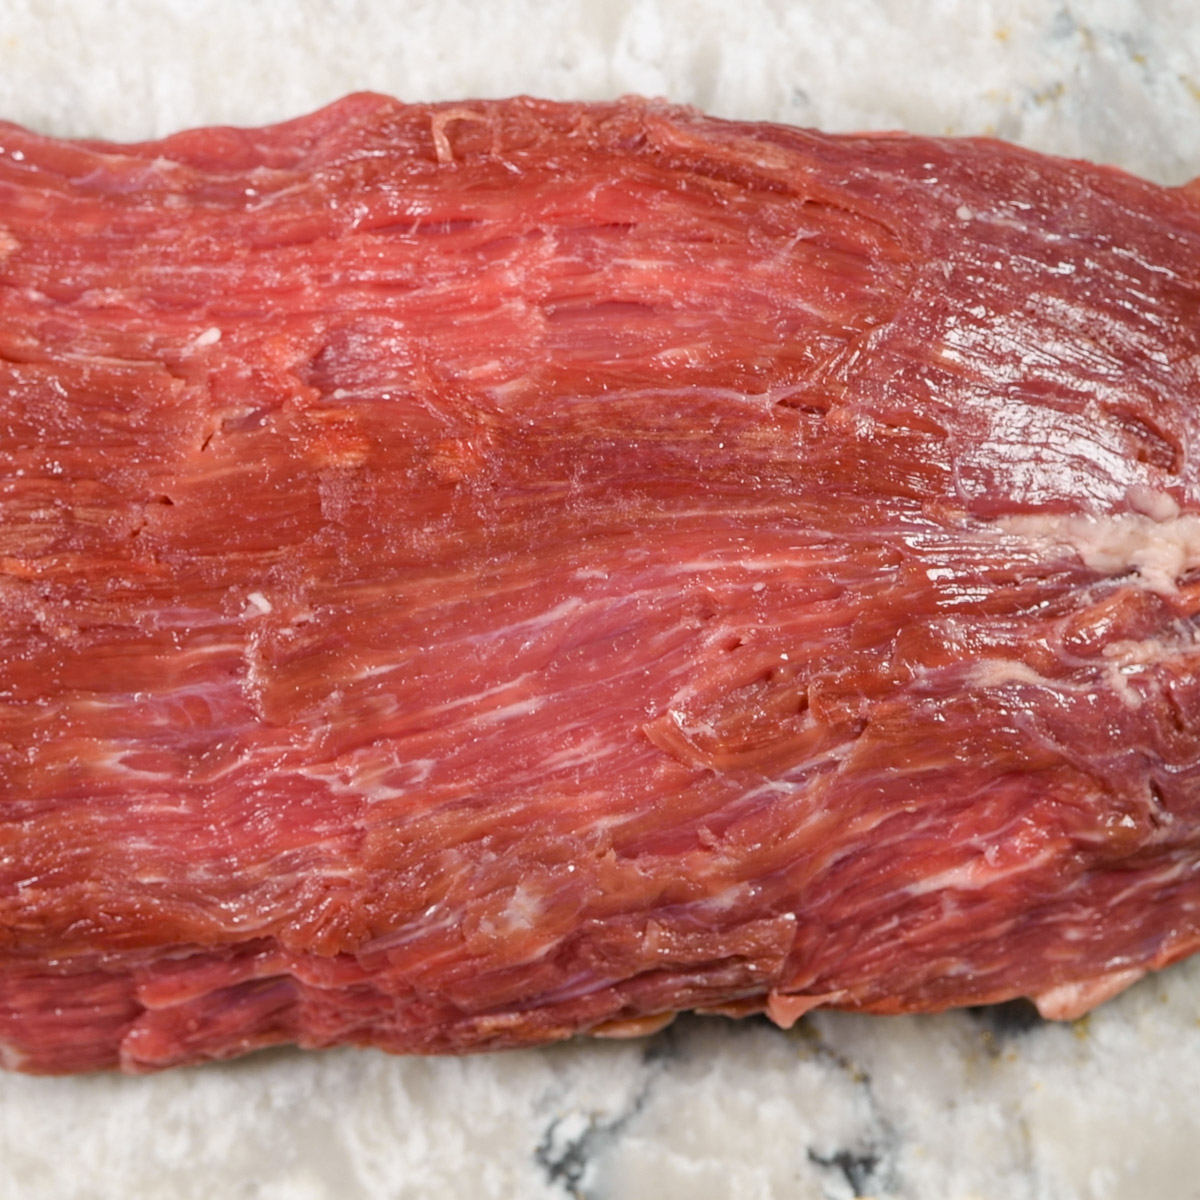
This flank steak has a long grain pattern.
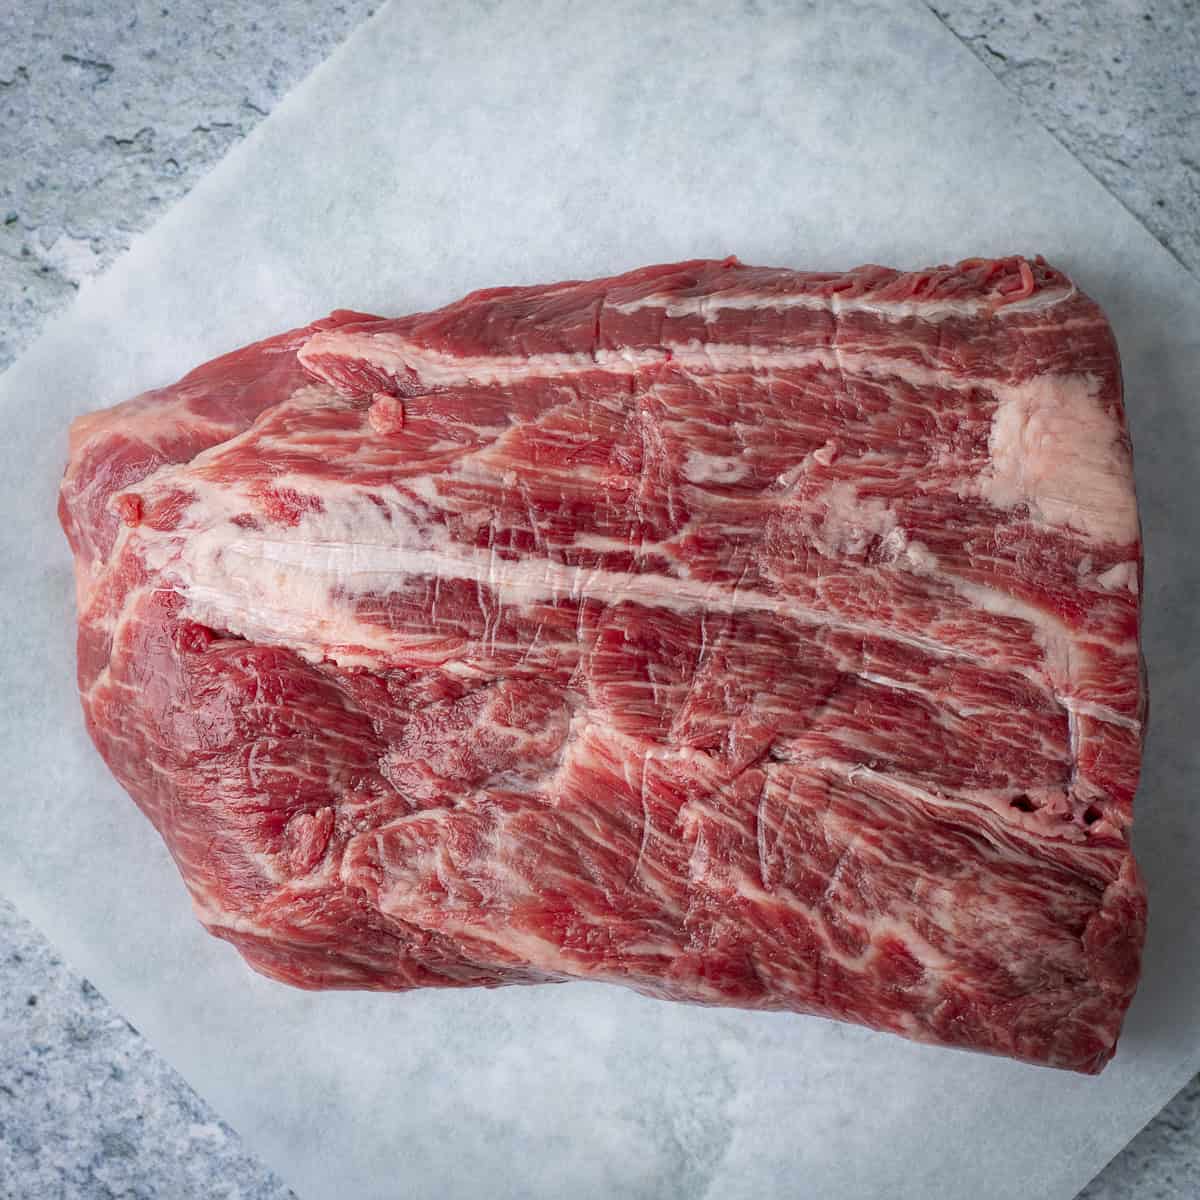
So does this flat iron steak.
Position the Meat for Slicing After Cooking
After cooking, let the meat rest for a few minutes to reabsorb its juices. Place the meat on a sturdy cutting board to make sure that it is stable and won't move during the cutting process.
If you made a notch in the meat before cooking, line that notch up in same orientation to locate the grain pattern. Otherwise, look for the direction of the fibers on the surface of the meat that run in parallel lines.
Choose a Sharp Knife
The right knife is critical for clean, precise cuts. Using a sharp knife, such as a slicing knife or chef's knife, is the best way to ensure smooth slicing. A dull knife can change the texture of the meat by causing tearing.
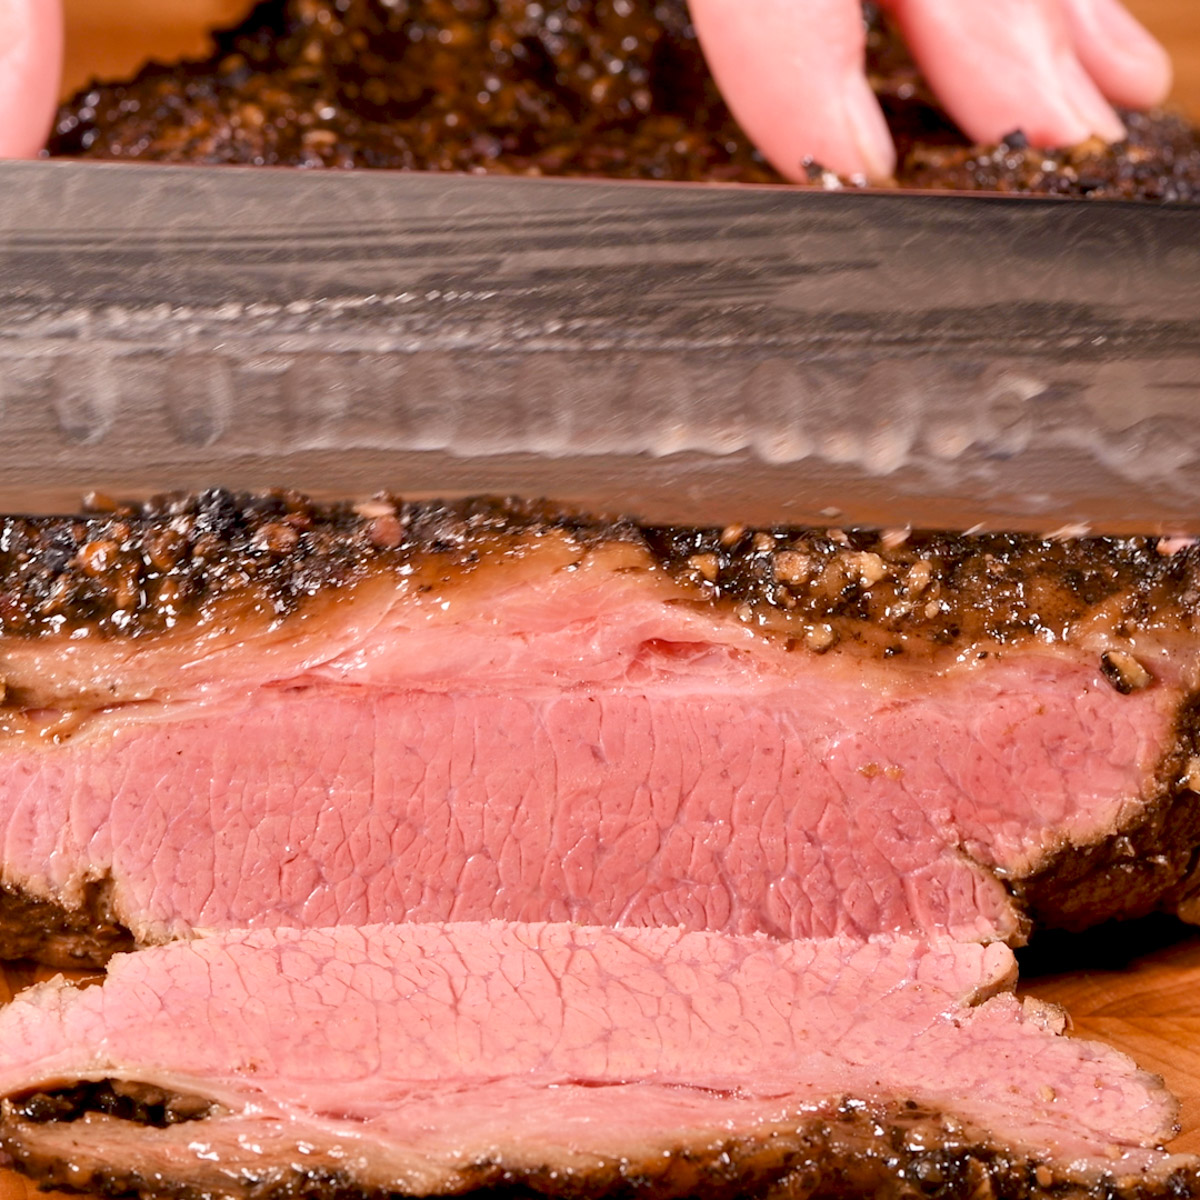
Begin Cutting
First, position your knife at a 90° angle to the grain so you cut across the muscle fibers. Next, tip the top of your knife so that it is at a 45° angle to the cutting board with the sharp edge pointing away from the hand holding the meat. This increases the surface area of each slice helps create more tender pieces of meat. For the best results, make very thin slices, particularly with tougher cuts of beef. You want those long muscle fibers to be as short as possible to reduce chewiness.
Adjust the Angle for Different Cuts of Meat
Some cuts, like hanger steak or a whole brisket, have multiple muscle groups with fibers running in different directions. In these cases, adjust your cutting angle as needed to ensure that you are always cutting against the grain. For a brisket, you could always separate the flat from the point before slicing.
Other cuts, like filet mignon, NY strip, T-Bone steaks and ribeye steaks have already been cut across the grain. To cut individual steaks out of whole beef tenderloin, cut perpendicular slices across the tenderloin.
Top Tip
Always use the right tool for the job. Invest in a quality chef's knife and keep it sharp for clean cuts every time. For the best results, always position your knife so you cut across the grain and at a 45° angle to the cutting board.
Final Thoughts
Cutting a steak against the grain is a simple, but essential technique that makes a big difference in the tenderness of the meat. By using the right knife and paying close attention to the grain direction, you can easily transform tougher cuts into tender slices of meat every time.
Related
Looking for more information? Check out these posts.
Leave a Reply